The Nepalese Himalayas is on the bucket list of many avid hikers and for good reason: This mountain range is home to the tallest peaks on earth as well as the incredible Himalayan people and their culture.
Like many others, we wished to hike to the iconic Everest Base Camp (EBC), the starting point for people summiting the world’s highest mountain. However, the return trip to EBC has become the most popular trek in Nepal, resulting in the route being somewhat crowded. Seeking a quieter alternative, we decided to take on the challenge of another trek in the region that would still lead us to EBC, but would do so on a considerably more demanding path: Three Passes Trek.
In this guide, we have gathered all the knowledge we gained on our own hike, as well as all the stuff we wish we had known before going. We will cover how to get to the trail, where to sleep and eat, what to pack, and budget for the trek. We hope that this post will be a source of inspiration and a helpful tool when you plan your journey.
Remember that hiking is always done at your own responsibility and at your own risk.
Table of Contents
ToggleThree Passes Trek: The Quick Stats
Distance
170-230 km
Starting point
Chaurikharka
Total elevation
15,500 m
End point
Salleri
Duration
16-25 days
Accommodation
Teahouses
Map
What to Expect
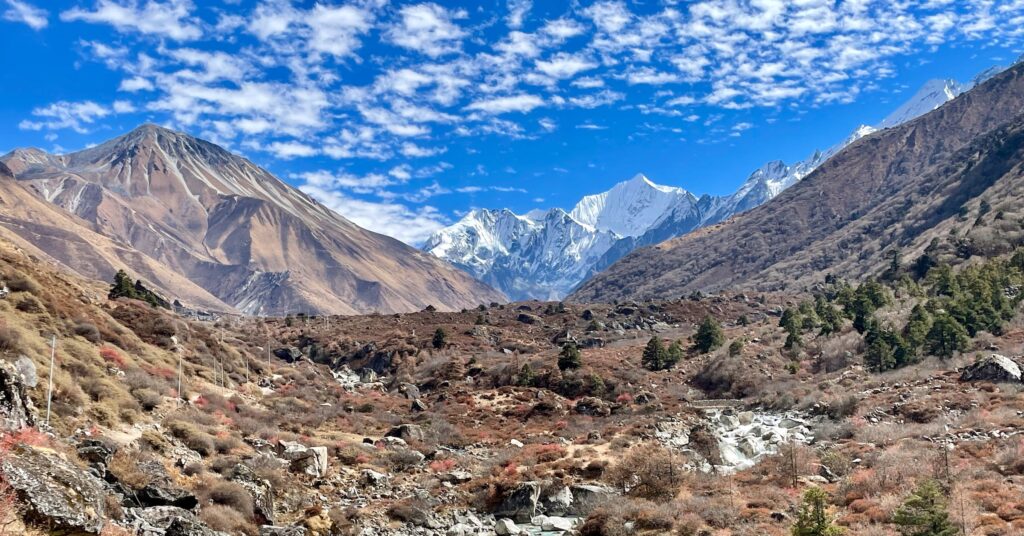
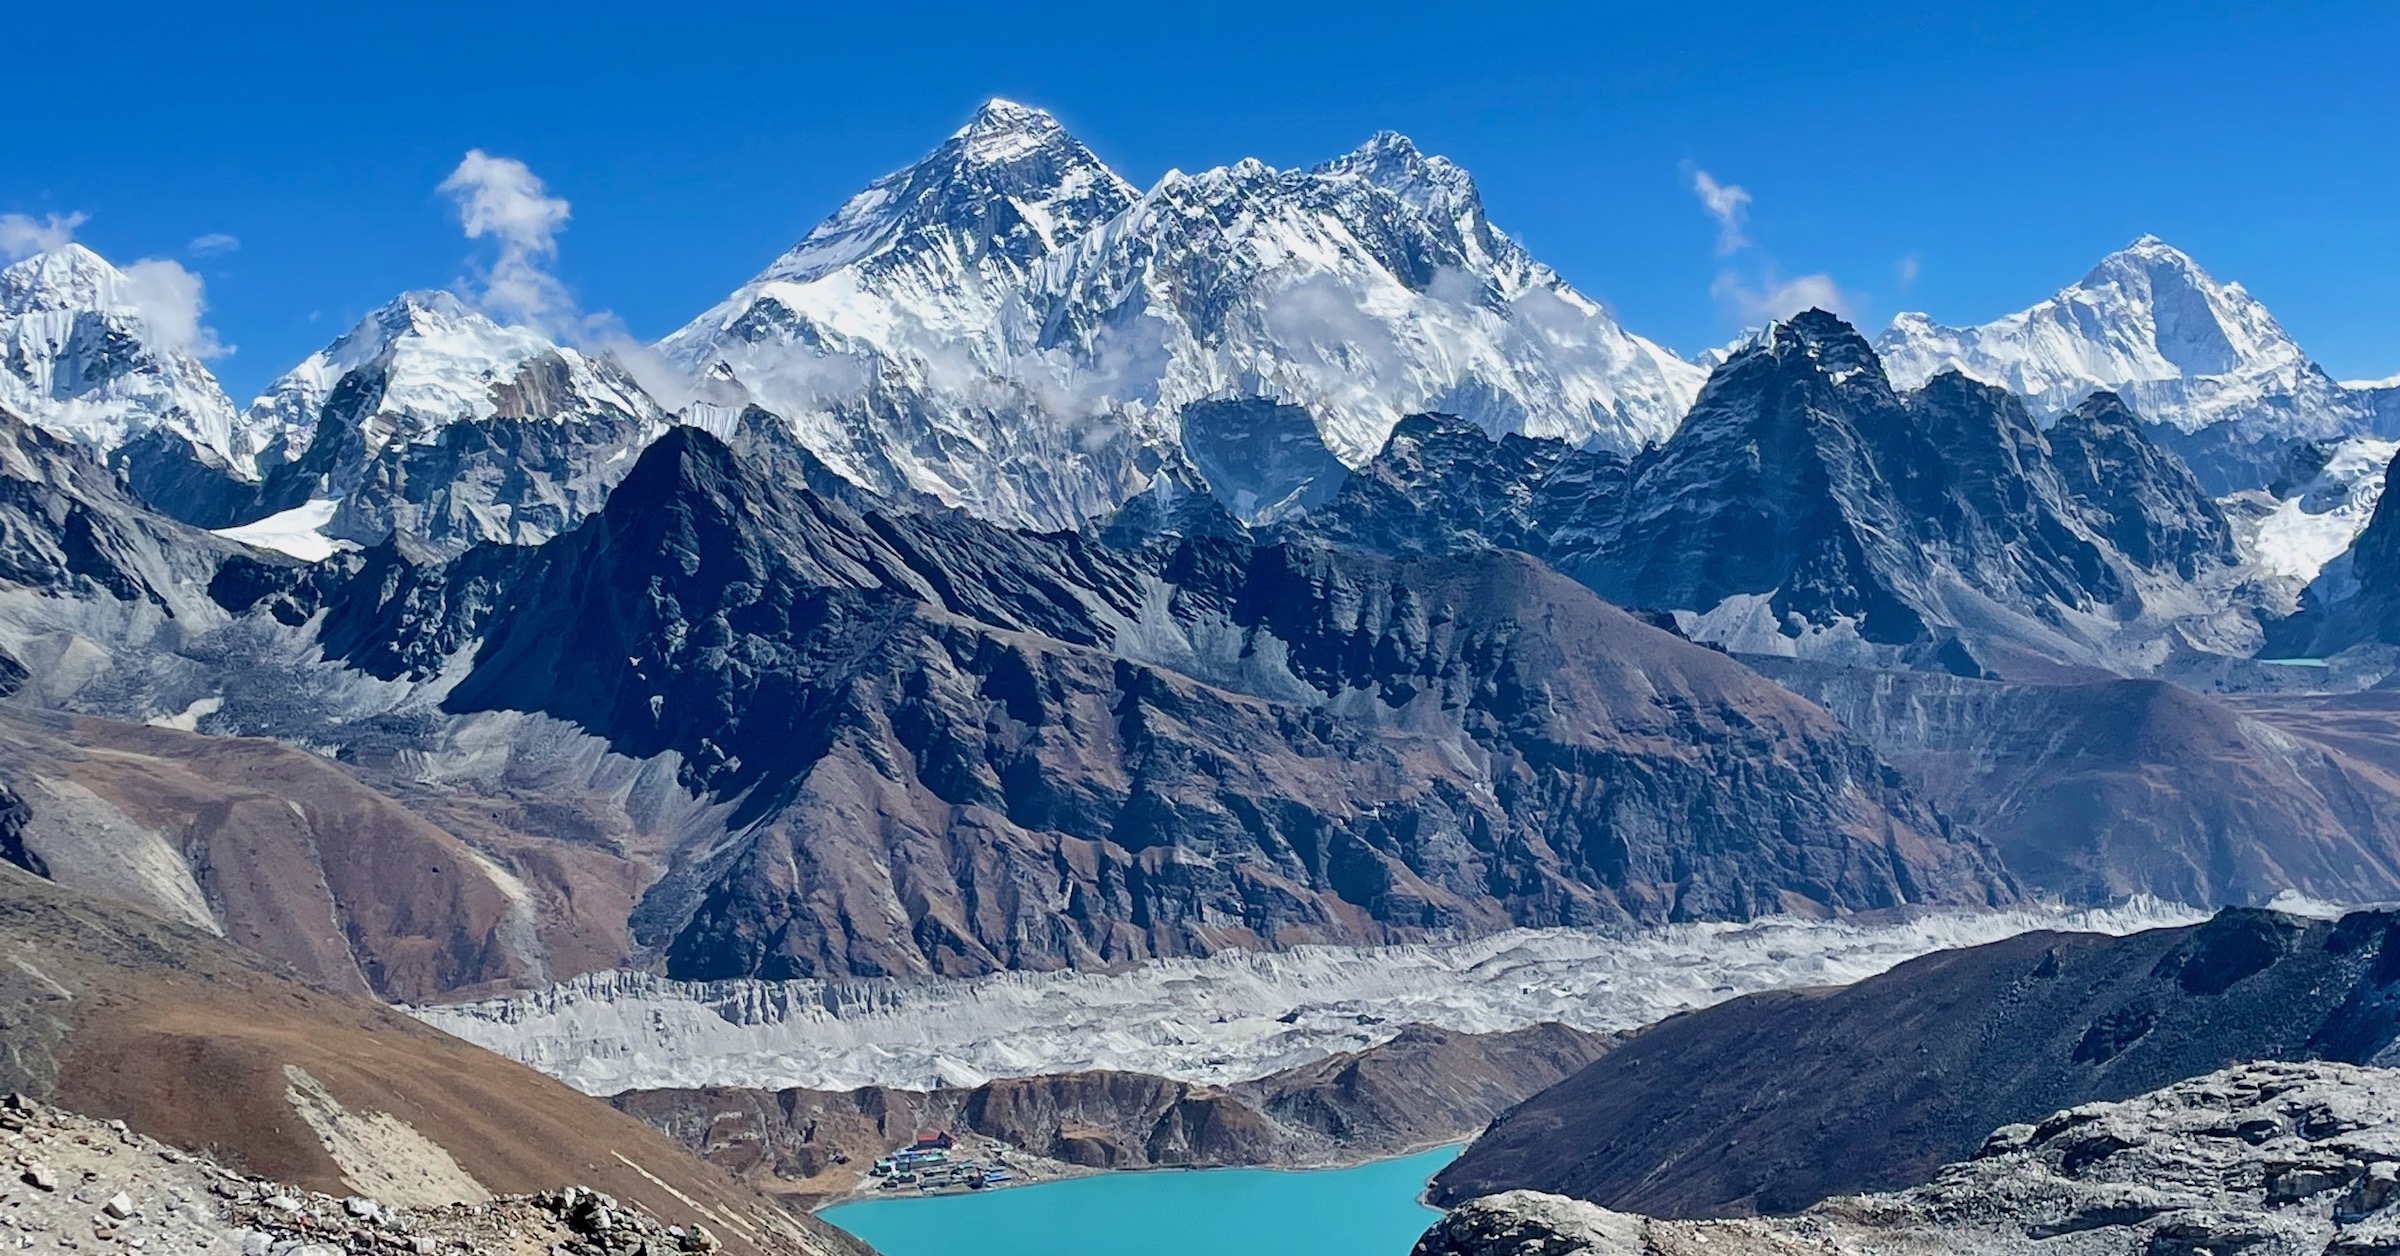
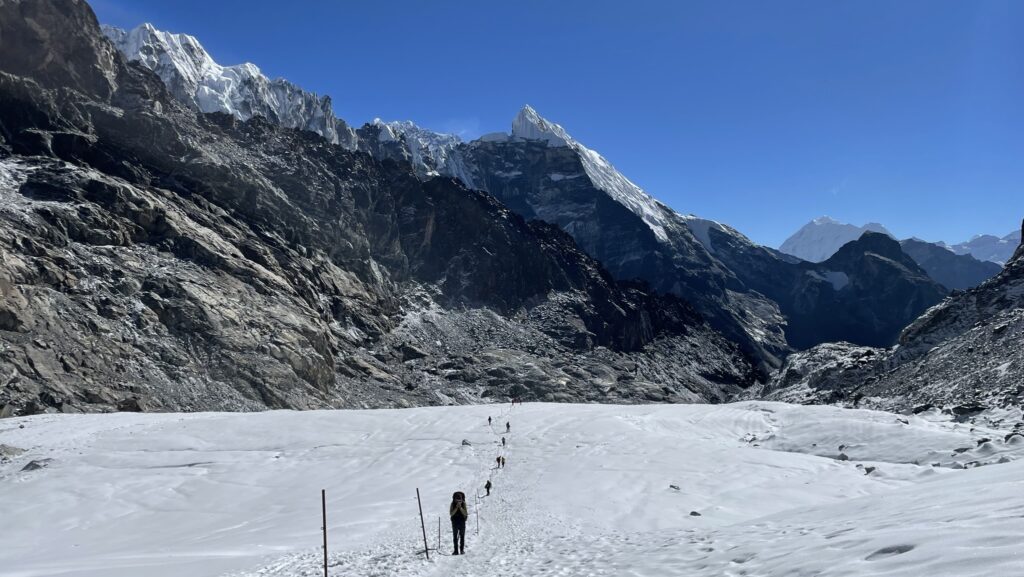
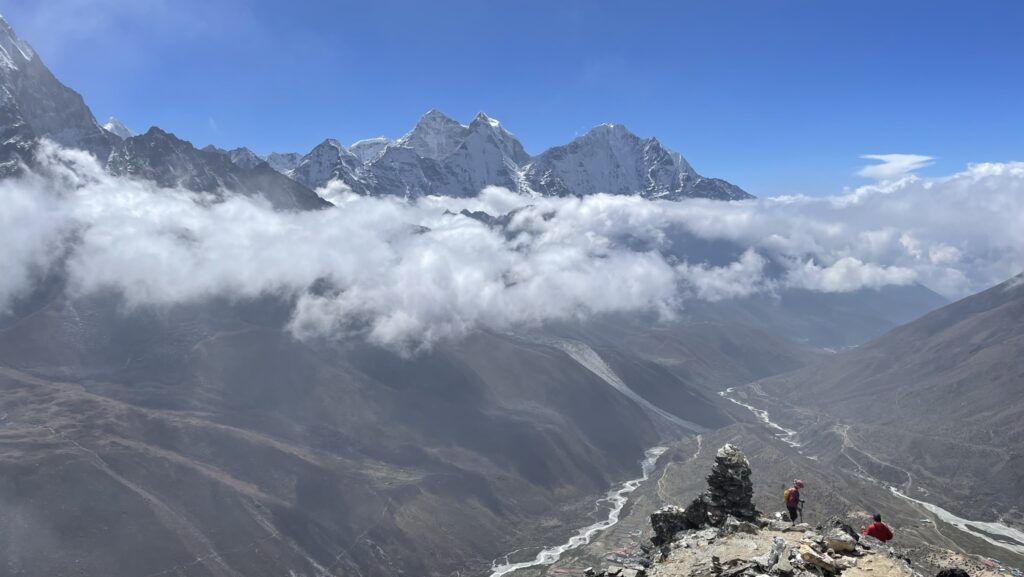
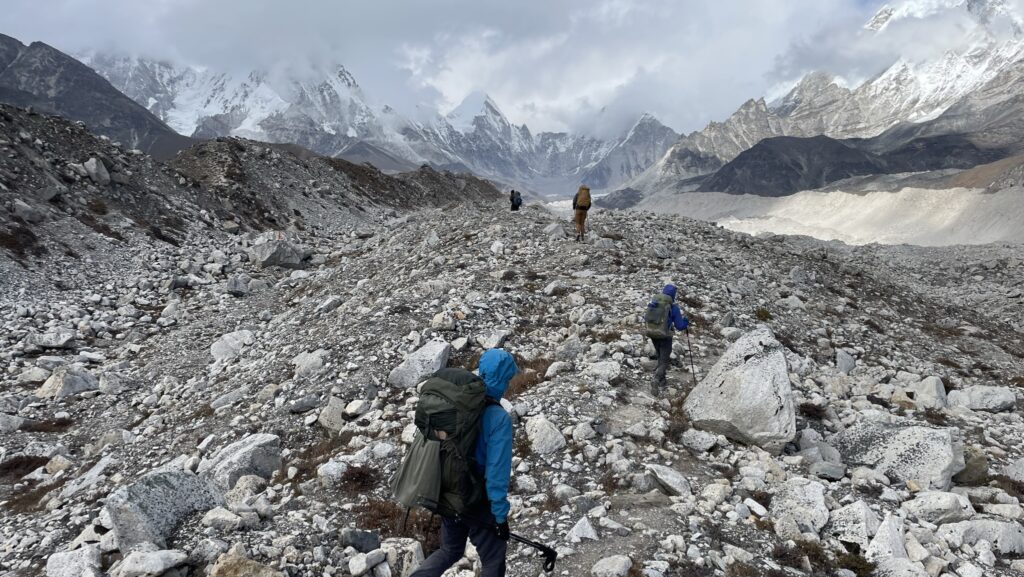
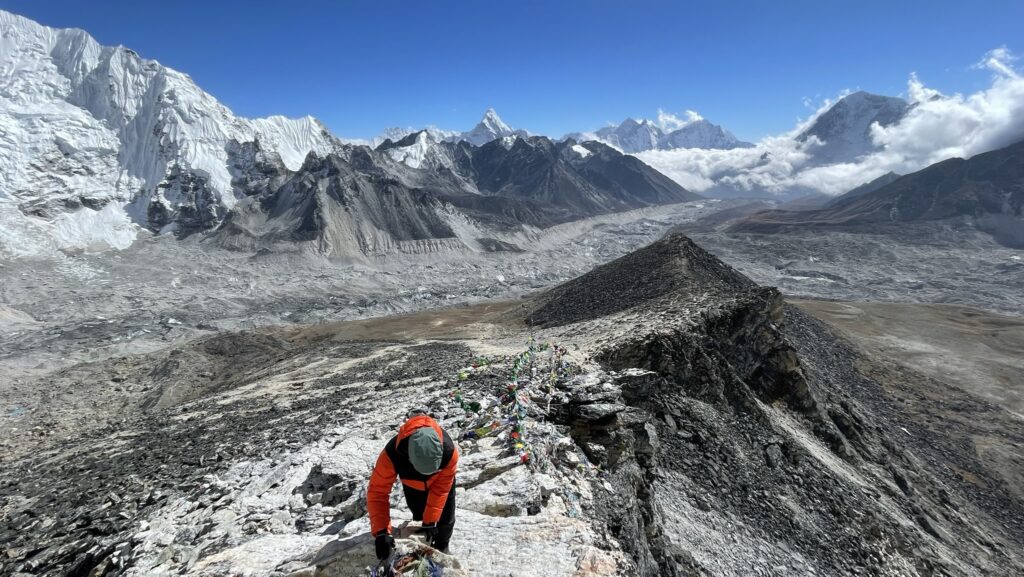
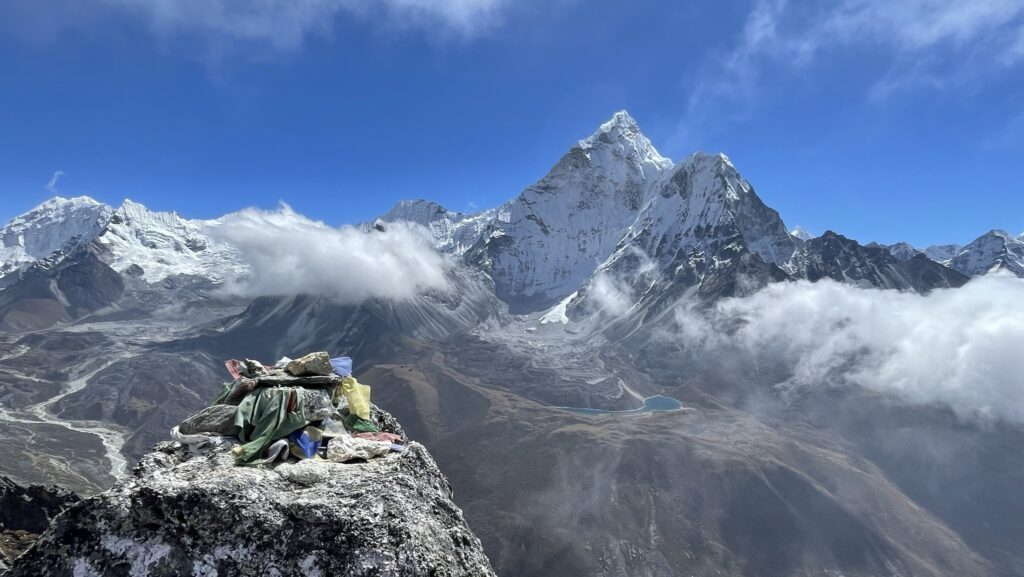
Three Passes Trek is a circuit hike climbing three passes over 5300 m with the option of adding a side trip to visit Everest Base Camp. Over the course of 2–3 weeks, the trail leads through beautifully secluded valleys, pristine mountain villages, and enormous glaciers. With many optional side trips, you will have the possibility of summiting multiple non-technical 5000 m-peaks on the way. The combination of hiking at high altitude, in remote areas, and through difficult terrain makes for a tough but unforgettable experience.
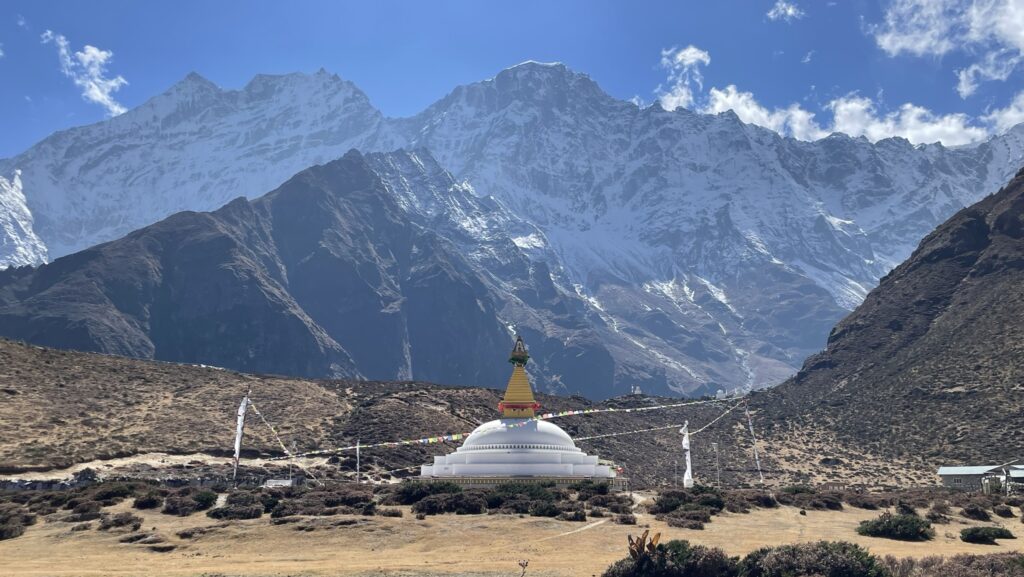
Beautiful Mountain Landscape
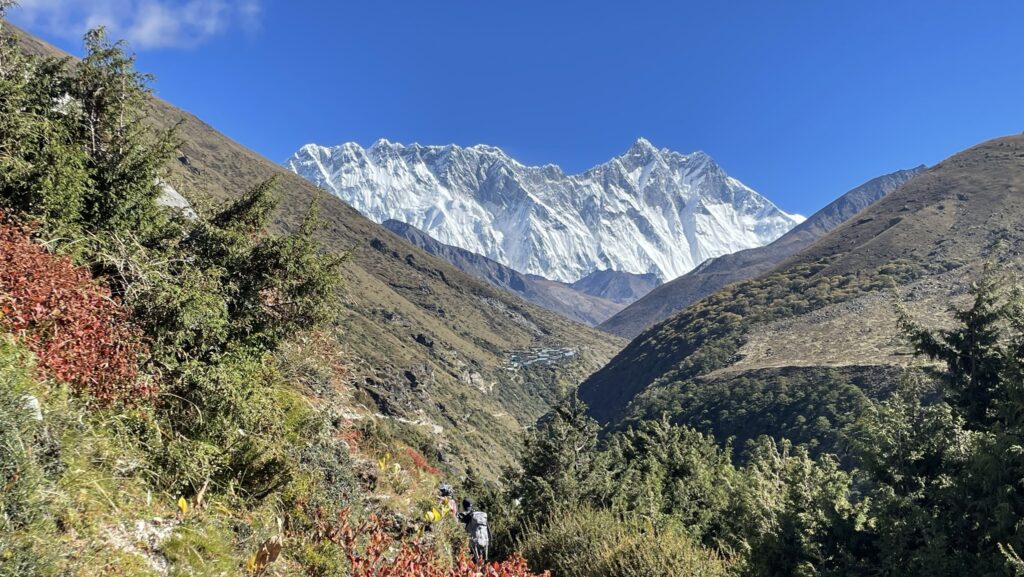
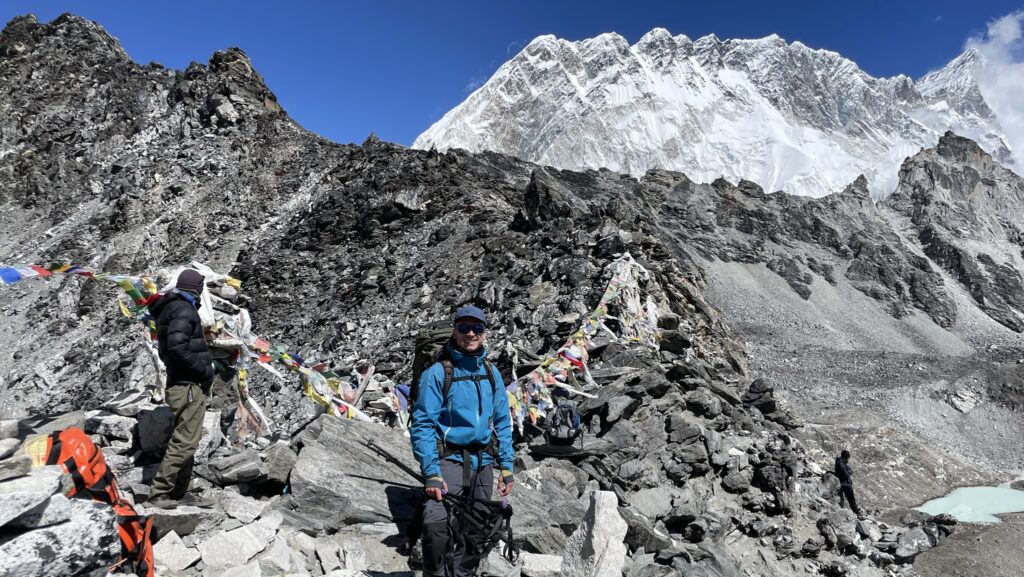
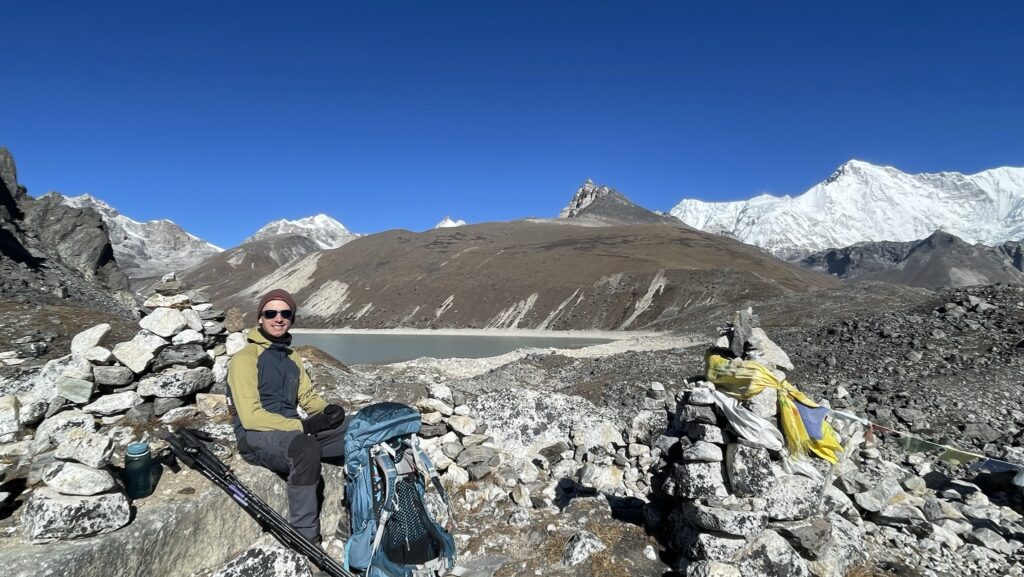
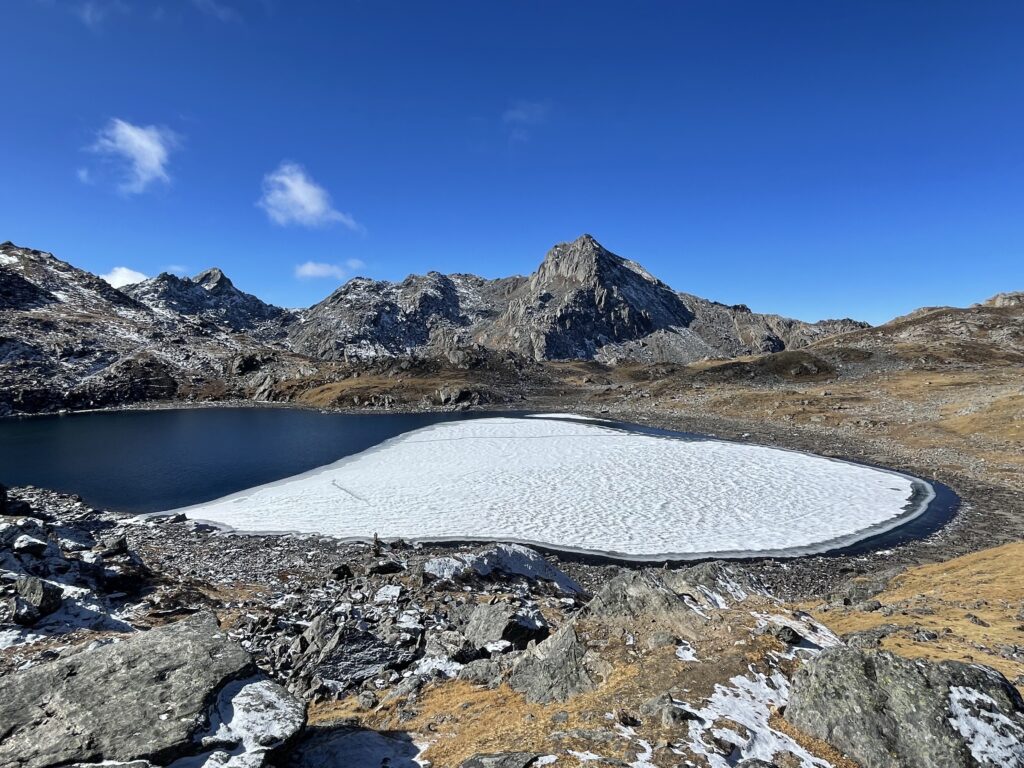
On this hike, you will walk in the beautiful landscape the Himalayas have formed. Here, you will find crystal blue mountain lakes, high passes with amazing views, enormous glaciers, and snow-capped peaks as far as the eyes can see. The landscape of the Himalayas is truly like nothing else.
Walking the Three Passes Trek, you will get to see several of the highest peaks on earth. The trek gives you amazing views of the world’s highest mountain, Mount Everest (8,848 m), and you will have the opportunity to walk to Everest Base Camp from which mountaineers begin their ascent of this impressive peak. Other 8000 m peaks you will see along the trek are Cho Oyu (8,201 m), Lhotse (8,516 m), and Makalu (8,462 m).
Local People & Culture
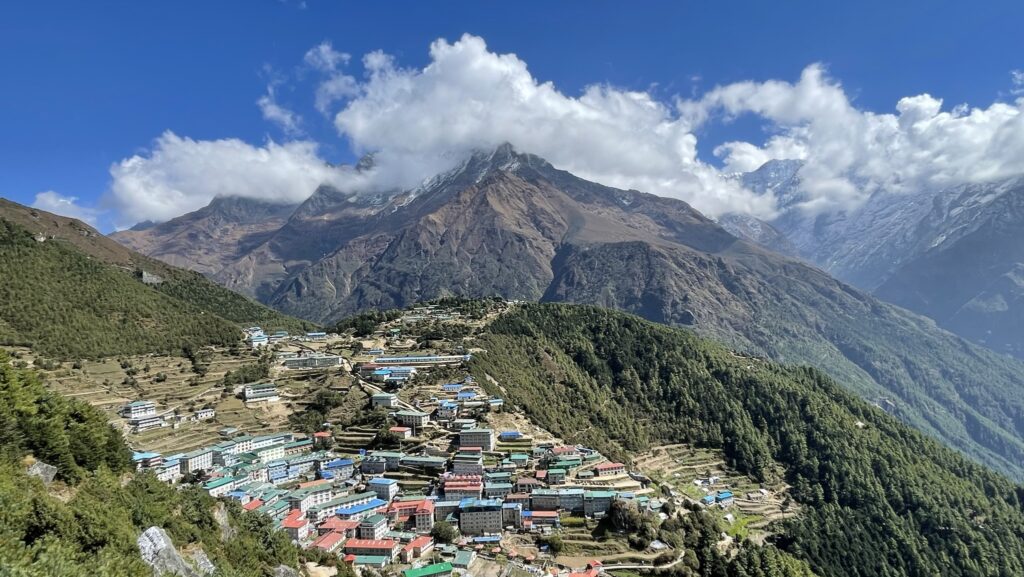
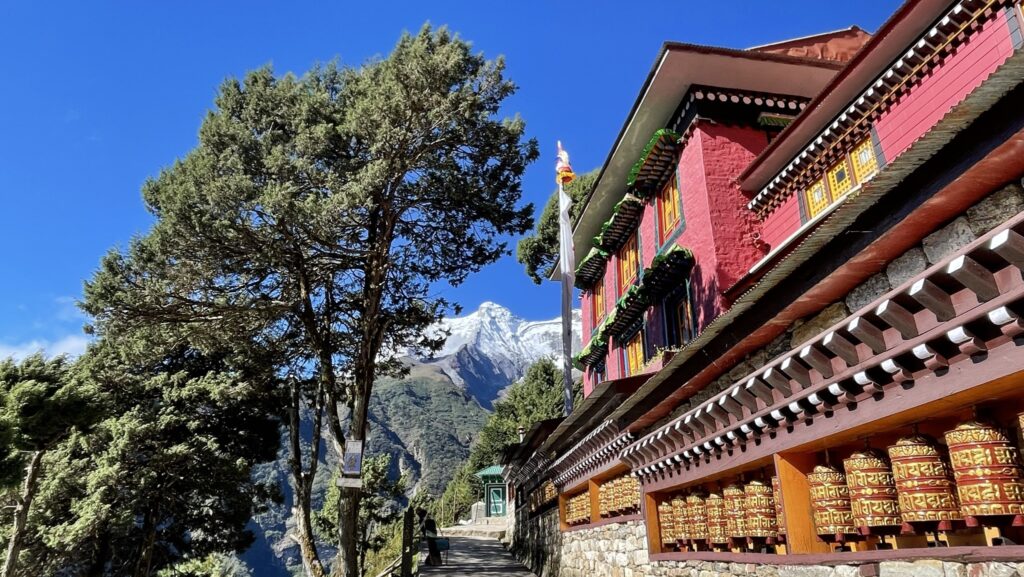
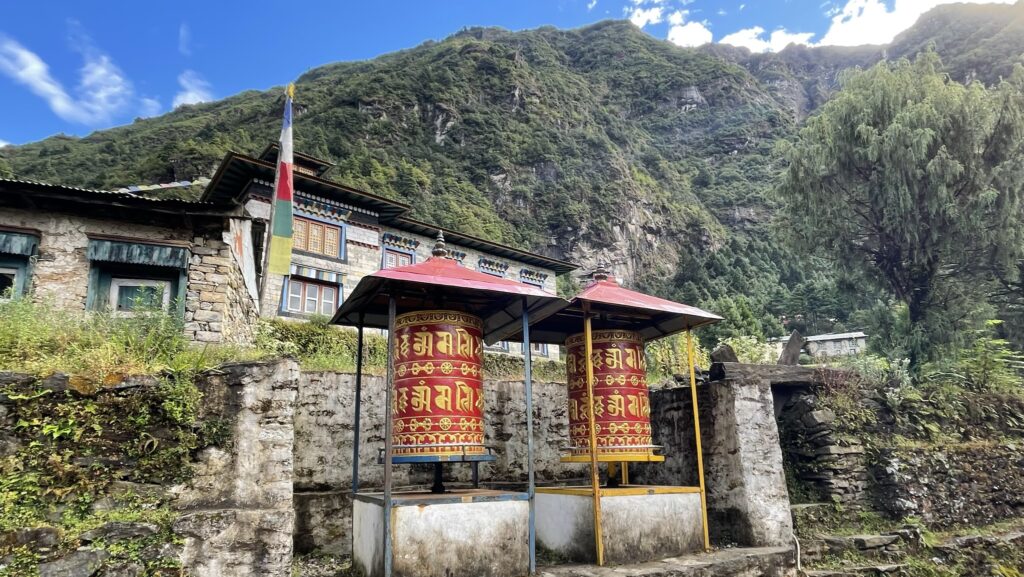
The local people of the Everest Region are known as Sherpas, a mountain folk who crossed into Nepal from Tibet many years ago. There are several ways to learn about Sherpa culture on the way: Talking with the local people, visiting the Sherpa Culture Museum in Namche, visiting the monasteries in Tengboche or Thame, or watching a documentary about Sherpa culture at Café 4410 in Dingboche.
Staying at teahouses along the trek also gives you the opportunity of getting to know the local people of Nepal and their culture. Nepalese people are very friendly and welcoming, and you will get the possibility of connecting with many locals along the way.
How Difficult is Three Passes Trek?
We consider Three Passes Trek a difficult hike that should only be undertaken by experienced hikers who have (preferably) done high altitude trekking before. There are several aspects of this trek that make it something not to be taken lightly:
First, the path crosses several glaciers and remote high passes, meaning that good navigation skills are a necessity. Above Namche, you will be at high altitude for 2–3 weeks which makes altitude sickness a considerable risk. In addition, the weather in the Himalayas is known to be unpredictable with sudden storms happening occasionally. Lastly, the trek is fairly long and requires a good level of fitness.
In sum, proper preparation, good navigation skills, and previous hiking experience are key to a successful trip. Hiring a guide is a good option if you are unsure about certain aspects of this trek. You might also consider shortening the trek by following one of the alternative itineraries we present in this guide.
When to Hike
The best time for hiking Three Passes Trek is autumn (October-November) and spring (March-May). At these times of the year, the weather is typically clear and stable. You might encounter a bit of snowfall on the high passes but most days will likely be sunny in the morning with some clouds rolling in during the afternoon.
Summer (June-September) coincides with the monsoon season in Nepal and is generally considered a bad time for trekking. In these months, visibility might be low, and the amount of precipitation is usually very high. Note that, in recent years, the monsoon season has become less predictable, meaning that it might start earlier or end later than normal.
It is generally not advised to set out on Three Passes Trek in winter (December-February). Even if teahouses along the trek are open (which you would need to check beforehand), you would probably encounter harsh conditions and considerable amounts of snow that may increase avalanche danger. Crossing the high-altitude passes would require you to have some serious mountaineering experience.
Getting to the Trail and Back
There are several possibilities for where to start your Three Passes Trek. First, you will need to reach Kathmandu, the capital city of Nepal. Kathmandu can be reached by airplane, or, if you are coming from India, by bus.
Many people spend a day or two in Kathmandu before leaving for the trek to do some sightseeing, stock up on hiking gear or snacks, or simply just take in the vibe of this bustling city.
Getting to Lukla
From Kathmandu, you will need to reach the mountain village of Lukla. While most people choose to fly to Lukla, current road development has made it possible to reach Lukla by a combination of buses/jeeps and walking. Depending on how much time you have and how much you wish to hike, here is a quick overview of four different ways to reach Lukla from Kathmandu:
- Fly to Lukla (20 min) – 1 day
- Bus/jeep to Salleri (12-14 hours), jeep to Khari Kola, Bupsa, or Thamdanda (4-6 hours), and hike to Lukla (2 days) – 4 days
- Bus/jeep to Salleri (12-14 hours) and hike to Lukla (4 days) – 5 days
- Bus/jeep to Jiri (7-8 hours) and hike to Lukla (7 days) – 8 days
You can read more about each option in our in-depth guide on how to get to Lukla.
Our Itinerary
We began our trek in Jiri and ended it in Salleri. We originally planned for 25 days of trekking from Lukla/Chaurikharka, including one rest day in Namche. We ended up spending 2 extra days resting due to getting a cold in Lobuche.
Keep in mind that our itinerary is rather long due to our wish to do as many side trips as possible. The side trips were incredible and definitely helped us acclimatize to the high altitude, but if you have limited time, some can be cut out to shorten the itinerary.
Here is a complete break-down of our anti-clockwise itinerary starting in Chaurikarka and ending in Salleri. Please see our guide for trekking from Jiri to Lukla (LINK) for our itinerary on this part of the trek.
Day | Destination | Time (hours) | Distance (km) | Ascent (m) | Descent (m) |
|---|---|---|---|---|---|
1 | Monjo (2835 m) | 4 | 11.5 | 720 | 480 |
2 | Namche (3440 m) | 3 | 5.5 | 720 | 150 |
3 | Rest day in Namche | - | - | - | |
4 | Khumjung (3790 m) via Hillary Viewpoint (4520 m) | 4 | 7 | 790 | 400 |
5 | Pangboche (3950 m) | 5 | 10.5 | 900 | 750 |
6 | Day trip to Ama Dablam Base Camp (4600 m) | 4 | 8.7 | 730 | 730 |
7 | Dingboche (4410 m) | 2.5 | 6 | 440 | 80 |
8 | Day trip to Nangkartshang (5041 m) | 4.5 | 4.7 | 720 | 720 |
9 | Chukkung (4750 m) | 2.5 | 5.5 | 450 | 20 |
10 | Day trip to Chukkung Ri (5546 m) | 5 | 5.6 | 770 | 770 |
11 | Lobuche (4920 m) via Kongma La Pass (5535 m) | 8.5 | 10 | 870 | 690 |
12 | Gorakshep (5150 m) via Khala Patthar (5645 m) | 7 | 8 | 730 | 490 |
13 | Lobuche (4920 m) via Everest Base Camp (5270 m) | 5 | 10.5 | 220 | 450 |
14 | Dzongla (4830 m) | 3 | 6.5 | 190 | 280 |
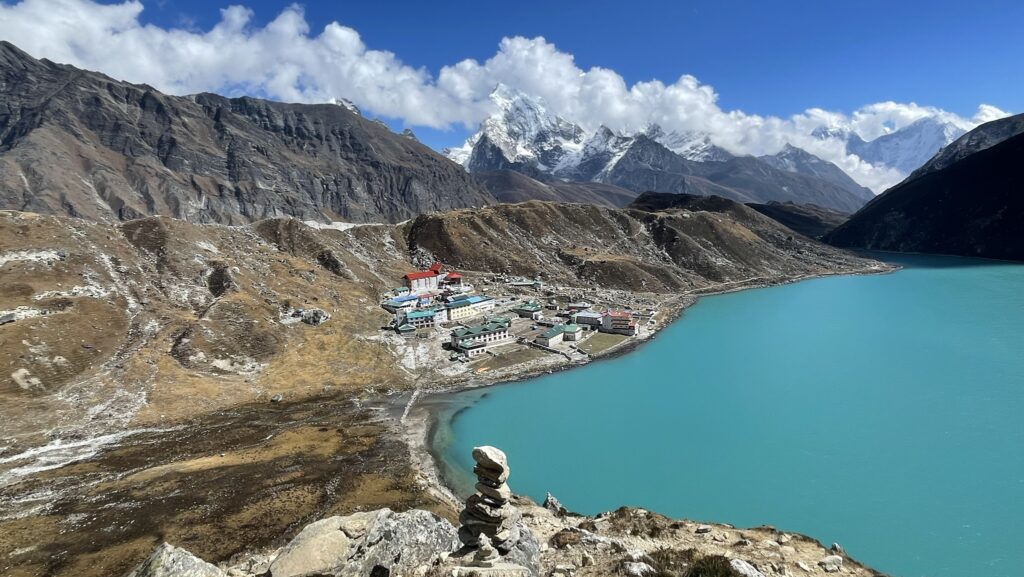
15 | Gokyo (4750 m) via Cho La Pass (5420 m) | 8 | 12.3 | 790 | 870 |
16 | Day trip to Gokyo Ri (5357 m) | 4 | 3.5 | 580 | 580 |
17 | Day trip to Cho Oyo Basecamp (5200 m) | 9 | 19 | 620 | 620 |
18 | Lumde (4380 m) via Renjo La Pass (5360 m) | 7 | 11 | 640 | 1000 |
19 | Thame (3800 m) | 4 | 11.5 | 210 | 800 |
20 | Namche (3440 m) | 4 | 8.5 | 220 | 540 |
21 | Chuplung (2800 m) | 5 | 15.7 | 630 | 1400 |
22 | Lukla (2860 m) | 1.5 | 2.3 | 180 | 10 |
23 | Puiya (2850 m) | 5 | 9.5 | 750 | 840 |
24 | Kharikola (1980 m) | 5 | 8.8 | 360 | 1130 |
25 | Salleri (2360 m) | 12 | 28.5 | 2000 | 1650 |
Note that some of the days in our itinerary might seem short. But to allow your body to acclimatize and prevent altitude sickness, it is very important to gain altitude slowly. A good rule of thumb is to gain no more than 300 m of altitude per day and take one rest day per 1000 m ascent.
Which Direction to Walk
Since Three Passes Trek is a circuit, it is possible to walk in either a clockwise or anti-clockwise direction from Namche. Both directions have their pros and cons, and no direction is superior to the other – it all depends on which kind of experience you want.
Hiking in Anti-clockwise Direction
Most people walk Three Passes Trek in the anti-clockwise direction, mainly because it allows for easier acclimatization: the stages up the valley make for a gradual ascent with a maximum elevation gain of 400-500m per day and it is possible to do several side trips on the way. Since most people hike in this direction, you are more likely to meet fellow hikers to team up with for crossing the passes and glaciers, which is a great way to increase safety for all.
On the other hand, walking in this direction means that you will share the track with people walking to EBC, making the trail busier compared to walking clockwise. Lastly, if you walk anti-clockwise, you will have to cross the highest and most difficult Kong Ma La Pass (5535 m) first.
Hiking in Clockwise Direction
Walking in the clockwise direction is a less popular choice, meaning that you will enjoy a quieter trail. It begins in the lovely Thame Valley, which is often overlooked by people hiking in the region, starting off with a quiet and authentic experience. Additionally, you will save the toughest pass, Kongma La Pass, for last. The biggest con of hiking in clockwise direction is that acclimatization is more difficult due to the big increase in altitude at the beginning.
In conclusion, most people choose to walk anti-clockwise because this way makes acclimatization easier, and we decided to do so exactly for this reason.
Shorter Itineraries
It is possible to shorten Three Passes Trek by skipping one, two, or even all three passes. Here are a couple of alternative itineraries for shorter and less strenuous treks:
Renjo La Pass and Cho La Pass
Cho La Pass to Gokyo Lake
An even shorter alternative is to skip both Kongma La Pass and Renjo La Pass. Walking anti-clockwise, you will follow the itinerary above, but instead of crossing Renjo La Pass, you can walk down the valley from Gokyo. This route can also be done in the clockwise direction, starting in Gokyo valley and making your way to Everest Base Camp.
Everest Base Camp Trek
The most popular route in this area is the trek to Everest Base Camp and back. This route overlaps with Three Passes Trek up until Dingboche where Three Passes Treks continues towards Chukkung while EBC Trek turns towards Thokla. There are no high passes to cross on the EBC Trek, which makes it the easiest trail of the four presented in this post.
Permits
Before embarking on your trek, you will need to know which permits are required.
Officially, three permits are mandatory for Three Passes Trek:
- Sagarmatha National Park Permit (1000 npr for SAARC citizens, 3000 npr for all other foreign nationalities)
- Khumbu Rural Municipality Trek Card (2000 npr)
- Trekkers’ Information Management Systems (TIMS, 1000 npr for SAARC citizens, 2000 npr for all other foreign nationalities)
National Park Permit and Trek Card
You can buy Sagarmatha National Park Permit and Khumbu Rural Municipality Trek Card on the trek and do not need to obtain them in Kathmandu. You will need to show your passport when issuing the permits (but you don’t need to bring extra photos). Depending on where you start your hike, you have two options to buy these permits on the trail:
Starting in Lukla
If you start in Lukla, you can buy the permits at a small office immediately when you exit town.
Starting in Jiri, Salleri, or Bupsa/Thamdanda
If you decide to walk from Jiri, Salleri, or Bupsa/Thamdanda, you can buy the permits at the entrance to the Sagamartha National Park in Monjo.
TIMS Card
Officially, a TIMS card is required for anyone trekking in Nepal and can only be obtained at the Tourist Office in Kathmandu. You do not need to book an appointment, but you will need to bring the following:
- A copy of your passport
- 2 passport photographs
- An itinerary for your trek
Up until now, the local authorities in Solukhumbu have not checked for TIMS cards, but they might decide to do so in the future. Ask the local people in Kathmandu before you go to make sure you know what the situation is like at the time of your journey. We decided not to buy TIMS and were not once asked to show it on our trek in October 2023. In the end, it is up to you whether you want to take the chance of going on the trail without it.
Extra Permit When Coming From Jiri
If you decide to start your trek in Jiri, you will need an extra permit:
- Gaurishankar Conservation Area Project permit (3000 npr)
You can buy the permit at the checkpoint in Shivalaya just before you enter the conservation area. The permit can also be obtained at the Tourist Office in Kathmandu.
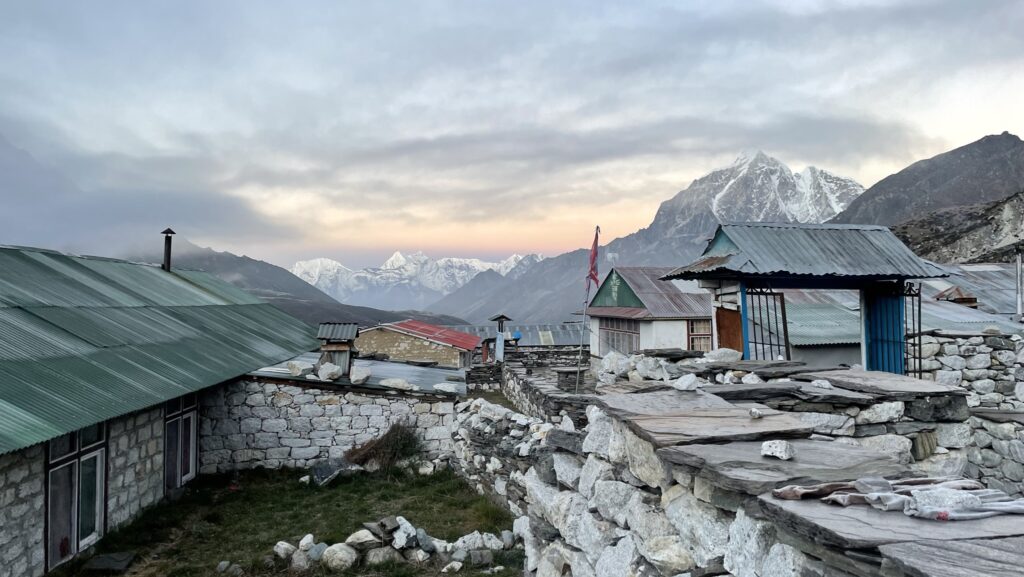
Accommodation
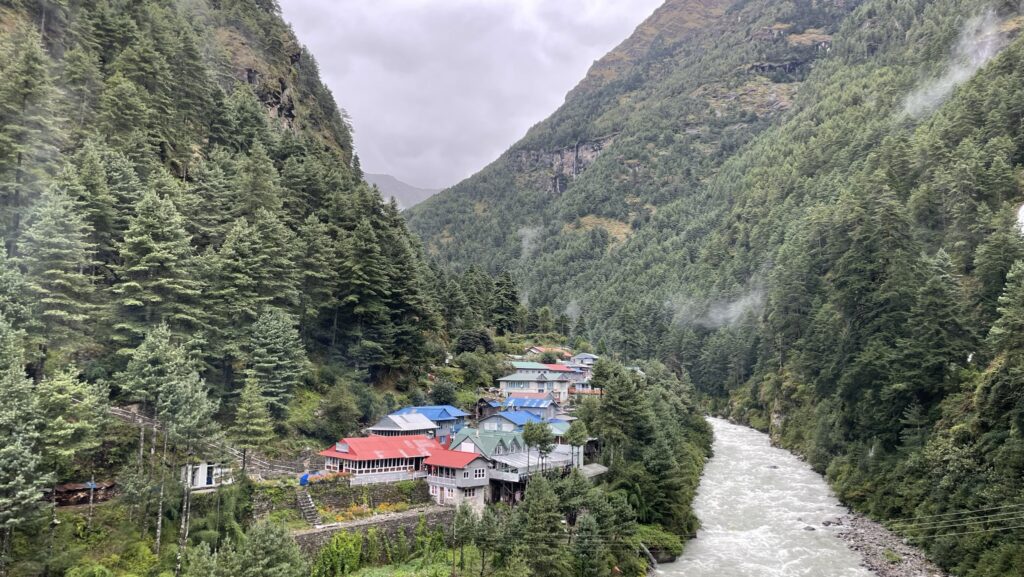
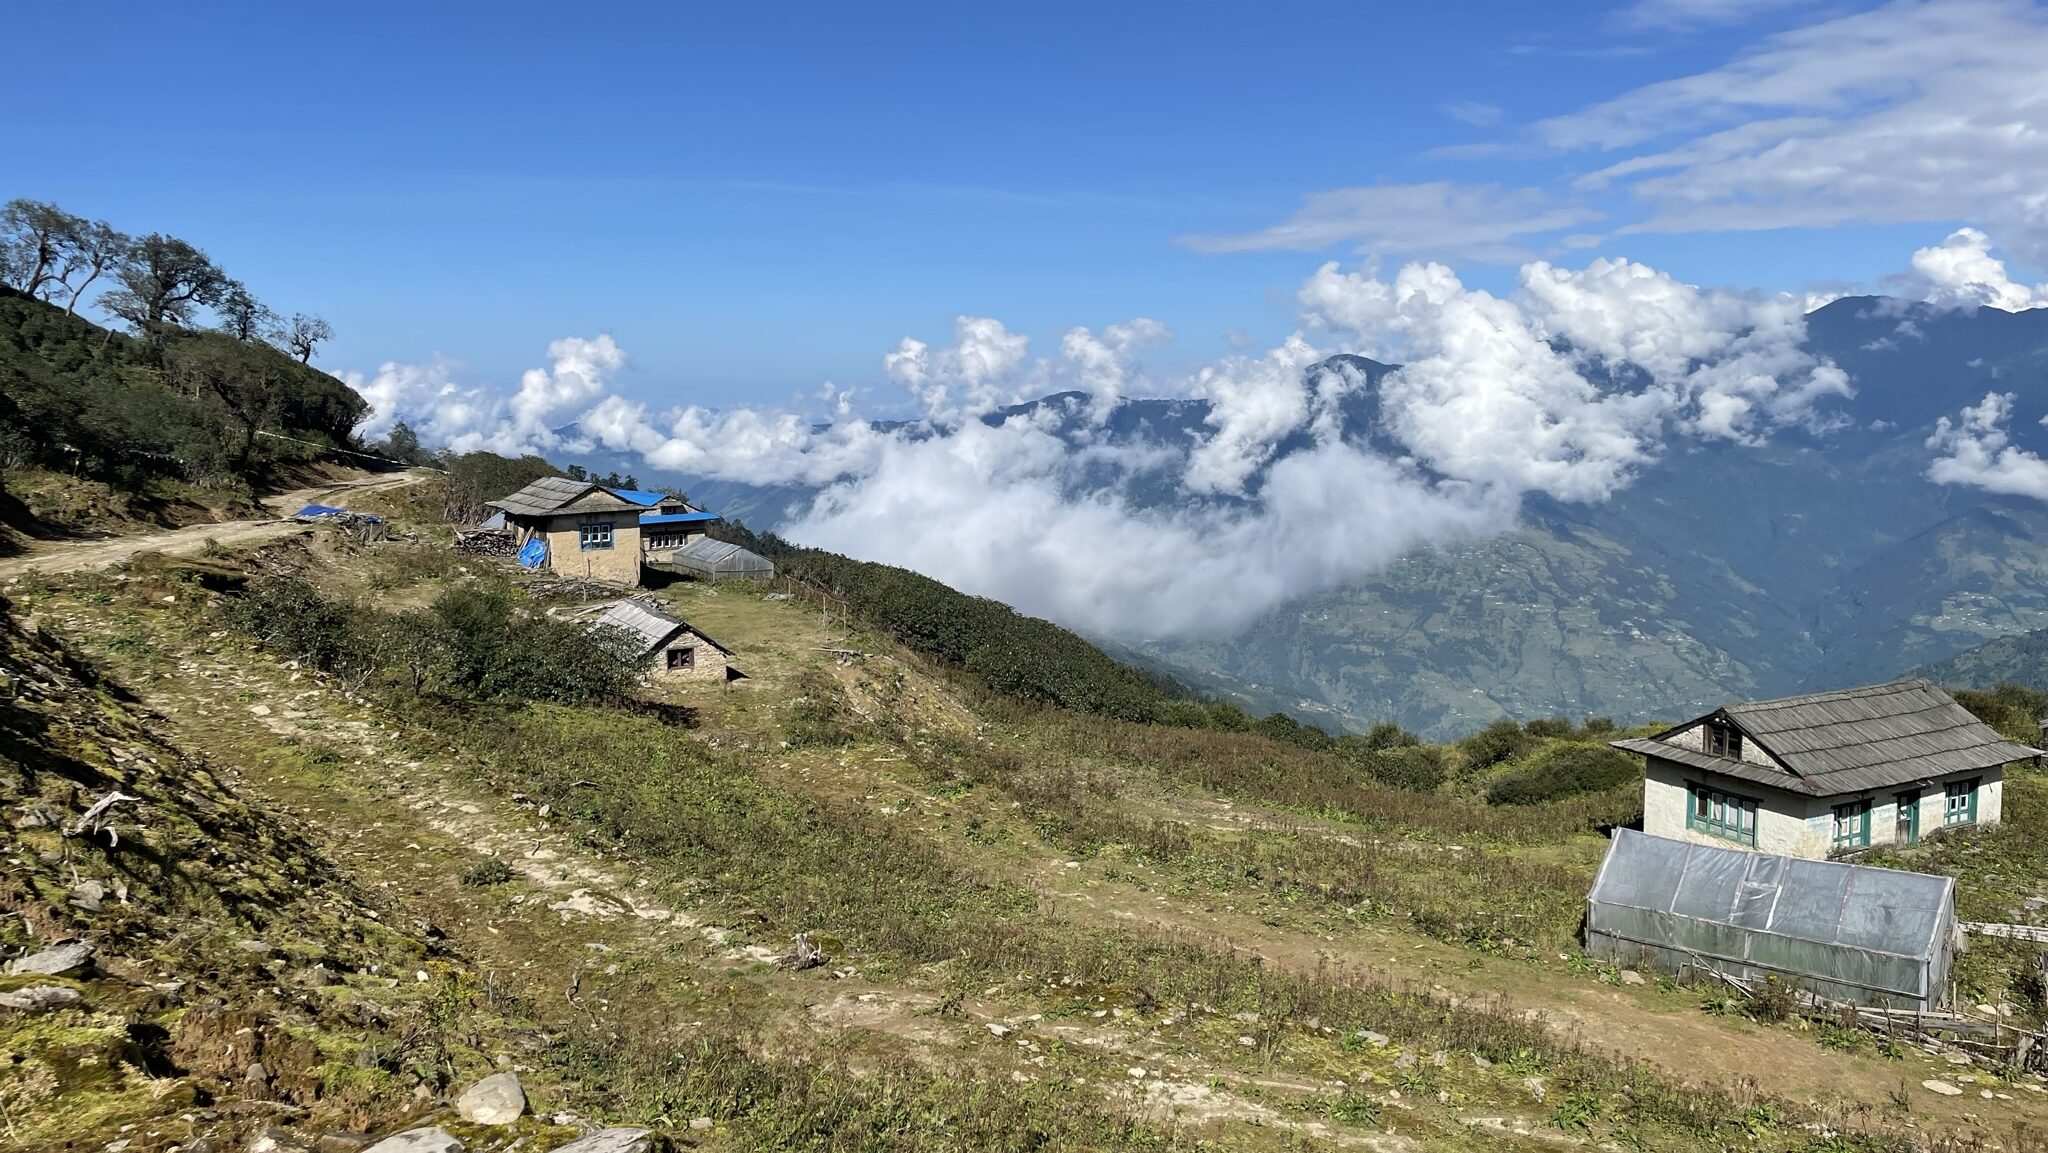
There are plenty of teahouses along Three Passes Trek for you to sleep at and enjoy home cooked meals. Teahouses are normally run by Sherpa families and consist of a dining room and a selection of bedrooms. The quality of the guesthouses vary considerably, but in general, rooms tend to be basic but comfortable.
How Much Does a Room Cost?
A room usually costs between 500-1000 npr ($ 3.75-7.50). Since the room price is quite cheap, you are expected to buy dinner and breakfast at the teahouse. If you decide to eat elsewhere, the room price will be considerably higher.
What are the Rooms Like?
Generally, rooms are simple and consist of two single beds with pillows and blankets, a small table, and a lamp. Some rooms might have power plugs for you to charge your devices. At most places, you will have to share the bathroom with the other guests, but some teahouses offer rooms with a private bathroom at a slightly more expensive price.
Do I Need to Make Reservations?
Generally, you do not need to make reservations at teahouses ahead of time. In most villages, there are plenty of guesthouses to choose from, so unless you wish to stay at a specific guesthouse, you will typically not have trouble finding a place to sleep.
Note that Lobuche and Gorakshep might be busy in high season since almost everyone on their way to Everest Base Camp stops here overnight. If you are hiking in high season, you might want to make a reservation for these places by asking the teahouse you were sleeping at to call ahead and book a room for you there. Making reservations might also be a good idea if you are trekking in a big group (i.e., more than 6 people).
Should you arrive at a village and realise that all rooms are occupied, there is always the possibility of sleeping in the dining room with the guides and porters. It is highly unlikely that it will be necessary though, especially if you are hiking in a small group. When we went during high season (October), we never had trouble finding a room.
Drinking Water
Water is generally easily accessible throughout the trek, although you will have to treat it before drinking it to avoid getting sick. There are several streams and rivers to take from along the way, and you will always able to get water at the teahouses. Read more about the different ways of treating water here (LINK).
Buying Bottled Water
You will also be able to buy bottled water in most teahouses. However, this is highly discouraged as the bottles have to be carried down from the mountain, and unfortunately, many don’t make it down and are instead left to slowly degrade in nature. Plastic pollution is a serious concern in the Everest Region, and several initiatives towards reducing plastic waste have been introduced here. For example, you can now help reduce waste by carrying 1 kg of waste down from Namche through the Carry me back inititative.
Food
Since the teahouses provide home-cooked meals for breakfast and dinner, you will not need to bring food or cooking gear along this trek. On most days, you will pass one or more teahouses during the day where you can have lunch, but when crossing the passes you will need to bring a packed lunch from your teahouse. Remember to order the packed lunch the night before so that it is ready when you set off in the morning.
Meals at the Teahouses
Teahouses tend to have rather similar menus throughout the trek. For breakfast, you can often choose between porridge, eggs, bread, or pancakes with fruit. For lunch and dinner, common dishes are fried noodles, fried rice, fried potatoes, and of course dal bhat.
Dal bhat is a traditional Nepalese meal consisting of cooked rice (bhat), lentil soup (dal), and a variety of side dishes such as curry or pickled vegetables. It is quite filling and makes for a perfect meal after a long, cold day of trekking. Dal bhat is usually a bit more expensive than other items on the menu, but unlike the other dishes, dal bhat comes with a free refill!
Charging
When staying at teahouses at lower altitude, your room will often have power plugs in it, and you can charge your devices for free. As you go higher, you will have to start paying a few bucks for power in most places.
Tip: In Dingboche, Café 4410 allows you to charge your phone for free if you buy something from them. This is a great opportunity to buy a cup of coffee or a piece of cake, sit back, and enjoy a board game or a movie while your phone is charging.
Internet
At lower altitude, most teahouses offer WiFi for free when you stay with them. Once you gain altitude, you will have to pay for WiFi. You can usually buy a WiFi card for 700-800 npr ($ 5-6) which gives you access to WiFi for 24 hours at a time that works at any teahouse.
We decided to not buy any WiFi along the trek as we actually enjoyed being off the grid for a while. Thus, we unfortunately don’t know how well the WiFi card works.
Buying a Local SIM Card
For some parts of the trek, you can connect to the internet through your phone if you have a local SIM card. When arriving in Kathmandu, you can buy a local prepaid SIM card from providers such as Ncell or Telecom. 4 weeks of data will cost you between 500-1000 npr ($ 3.75 – 7.5) depending on how much data you require. It can easily be topped up if it expires, or if you need to extend it.
We bought two Ncell SIM cards in Kathmandu, which provided us with internet access on-off up until Dingboche. From there, we had no signal until we reached Thame. Those who bought a SIM card from Telecom often had slightly better coverage than we did, so we suggest buying a Telecom SIM card instead.
Navigating the Trail
The trail is somewhat marked along the way with signs and cairns. The lower trails are rather busy and usually quite easy to navigate. However, navigation skills are an absolute neccessity for crossing the passes which are more remote and without much signage.
You can find all trails on navigation apps such as Maps.me, Guru Maps, and Gaia GPS. Remember to download the map of the Everest Region in the app you are using to be able to use it offline. If you search online for a GPX file for Three Passes Trek, you will easily find one to download, which you can then add to your preferred navigation app.
To not solely rely on your phone for navigation, we always encourage you to carry a physical map and a compass. You can find a physical map for Three Passes Trek in a map or book store in Kathmandu at a cost of 600-700 npr ($ 4.5-5).
Is A Guide Needed for This Trek?
Whether or not you need a guide on this trek is slightly complicated. While officially, you are required to hire a licensed guide when trekking in Nepal, in reality, the rule is yet to be enfored in the Solukhumbu area. Personally, we did not encounter any problems trekking without a guide in October 2023. However, the government might decide to enforce the rule without warning. To make sure you know what the situation is like today, make sure to check out the Facebook Groups Everest Base Camp or Trekking in Nepal before you go to.
Keep in mind that no matter what you read on the internet, hiking without a guide despite the rules is your decision alone and is always done entirely at your own risk.
Now, legal matters aside, the decision on whether or not to hire a guide is highly individual, and several factors should be taken into account. You can read our post about hiring a guide in Nepal (LINK) for more information about things to consider when making your decision as well as tips for hiring the right guide for you.
Packing List
While the specifics on what to pack varies from person to person, some things are essential to bring for your safety and comfort on this trek.
Click here to read our complete packing list for high-altitude trekking in Nepal.
A Quick Note on Altitude Sickness
At high altitude, defined as altitudes above 2400 m,
At high altitude (>2400 m), the air is thinner, meaning that there is less oxygen for you to breathe. The lack of oxygen can cause serious symptoms if your body is not allowed time for adjusting to the thin air.
Altitude sickness is a significant risk when trekking in the Himalayas and is something that should not be taken lightly. Besides posing a (potentially very serious) health risk, it is also a common reason for people having to quit their trip – which is a shame, when you have finally made it all the way to these beautiful mountains! Knowing the symptoms of altitude sickness, preventive measures, and what to do in case you get sick is key to get a safe and enjoyable trip.
Symptoms of Altitude Sickness
It Typical symptoms of altitude sickness are headache, shortage of breath, nausea, and a loss of appetite. This is called Acute Mountain Sickness or AMS. If you experience these symptoms, you should not gain more altitude before they subside. AMS can progress into two kinds of serious altitude sickness, HAPE or HACE.
In general, you should always listen to your body. You will experience signals such as headache, shortage of breath and nausea (this is called AMS – Acute Mountain Sickness) before serious altitude sickness (such as HAPE or HACE). Take the symptoms seriously and don’t gain altitude if you have these symptoms. Ask for help if you feel symptoms and watch out for each other. The Sherpas in the region have extensive experience with altitude sickness and can often help you with what to do.
Here are a few tips:
- Always take symptoms seriously. Even if have been to high altitude before without problems, you are still at risk when you go to a place of high altitude.
- Go slow and take frequent breaks. Pushing yourself too much makes your symptoms of altitude sickness worse. You don’t have to have a headache for the entire trip.
- Gain altitude slowly. A general rule is to sleep at most 500m above the altitude of your previous night. For some this might even be too much, and we recommend only gaining 300-400m of altitude each day until you’re acclimatised.
- Do side trips, i.e. walk high, sleep low. Doing a higher altitude side trip but sleeping following the rule above will allow your body to better acclimatise.
- Watch your blood oxygen saturation with an oxymeter. Many teahouses in the higher altitudes have one available for your use, otherwise consider bringing one yourself.
- Drink a lot of water. Your body works a lot harder in high altitude, so it also needs more water than at sea level. Drinking plenty of water is important to relieve symptoms of AMS.
Tips for Your Trek
Now that we have covered the what you need to know before you go, we will share a list of things that might be nice to know:
- Remember to buy travel insurance. Going on a high altitude trek is not a walk in the park, so to speak. It is absolutely necessary to have travel insurance that covers high-altitude activities in case you need a rescue. Some travel insurance does not cover high-altitude trekking, so please double check your insurance before you go.
- Spend an extra day in Namche. There is plenty of stuff to do in Namche: You can visit a cute cafe to have a coffee and/or a piece of cake, go to a bar to watch a movie about Mount Everest, or visit one of the many museums.
- Team up with other hikers when crossing passes and glaciers. The high passes and glacier crossings of this trek are serious endeavours. If possible, try to team up with other hikers on these stages to increase safety.
- Some areas might be crowded in peak season. Some sections of this trail overlap with the Everest Base Camp Trek and can get busy in high season. Some spots on this trek might be full of people and others feel very isolated.
- Explore the side trips. If you have the time, look into the possibilities of doing side trips along the trek. Consider walking to Ama Dablam Base Camp og Chukkung Ri for amazing views. As a bonus, doing side trips will help your acclimatization as you will “walk high and sleep low”.
- Add a couple of extra days in case of delays. Schedule a few extra days to your itinerary in case bad weather rolls in, you get sick, or simply need a rest day. It is very common to catch a cold on this trek (it even has a nickname: The Khumbu Cough), and being at high altitude makes recovery slow.
- Consider avoiding meat. Meat has to be carried all the way to the teahouses on either human, yak, or horse back, meaning that it is difficult to guarantee that it is still fresh when used for cooking. In order to avoid getting sick, we recommend that you avoid meat all together.
- Don’t take showers above Namche. It gets really cold at high altitude, and while taking a shower can seem nice after a long day of walking, your body will actually end up spending a lot of energy on heating you up afterwards. Therefore, it is generally not recommended to shower above Namche.
- Bring some protein powder. Your diet on the trek will mostly be carb based, especially if you decide not to eat meat. Pasta, rice, and potatoes are the basis of most meals you can get at the teahouses. In order to get enough protein, we wish we would have brought some protein powder to mix in with our porridge in the morning.
- You have to obtain a permit for flying drones. The permit costs $1500 and should be obtained before you go on the trek. Be aware that military staff will check through your backpack at Monjo to ensure that you do not bring a drone without a permit.
Budget
How much should you expect to spend on the Three Passes Trek? If you ask this question on the internet, you will get a wide array of answers, making it difficult to estimate what your daily average will be. When we planned our trip, we were so confused by the difference in how much people spent that we became completely overcautious. We ended up bringing more than double the amount that we actually spent!
The truth is, the daily budget for the trek varies a lot depending on how much you are willing to spend and how much “luxury” you want. Your daily budget can range from 3000-10000 npr ($ 25-60) per person per day, depending on how much tea, coffee, beer, food, and snacks you buy. It also depends on how many days you spend at high altitude: As a general rule, the prices rise with the altitude. For instance, a dal bhat in Namche will cost you around 600 npr, but will easily set you back 1000 npr in Lobuche or Gorakshep.
How Much Did We Spend?
On average, we spend about 3500 npr ($ 26) per person per day on accommodation, food, snacks and tea. We ate dal bhat almost every evening and chose one meal each for breakfast and lunch. We heard that snacks get wildly expensive at higher altitude and decided to bring snacks from Kathmandu and restocked in Namche.
In the afternoon, we typically shared a “small” pot of tea (1.5 l), and a few times throughout the trek, we splurged on coffee and cake (who knew that you could get a delicious piece of cake at 4400 meters?!). We never bought bottled water or beer, but we heard that both run quite expensive the further up you go.
Our Complete Budget Breakdown
Here is a detailed run down on what we (2 people) spent on our Three Passes Trek starting in Chaurikharka and ending in Salleri. We were on the trail for 27 days, including 2 rest days.
Note that we have not taken into account the days we spent hiking in from Jiri to Lukla, which were generally cheaper (see our budget for Jiri to Lukla in our post about this trek (LINK)).
- Permits: 10,000 npr (+6000 hiking in from Jiri)
- Snacks and toiletries bought in Kathmandu and Namche: 17,450 npr
- Food & accommodation at teahouses: 166,320 npr
- Cake & coffee at cafes: 7020 npr
- Bus from Kathmandu to Jiri: 2000 npr
- Bus from Salleri to Kathmandu: 1700 npr
- Taxi to and from bus stop in Kathmandu: 1200 npr
Bringing Money for the Trek
Now that you have an idea about how much you should expect to spend on the trek, let’s take a look at the practicality of how to pay on your way.
While a few places in Namche accept credit cards, most guesthouses only accept cash. This means that, generally, you will have to pay with cash almost everywhere on the trek (that is, of course, unless if you do the trek as a pre-paid tour through a trekking company).
Are There ATM’s Along the Way?
There is now an ATM in Namche, but it is unfortunately not very reliable. Hence, you should not rely on being able to use it on your trek. We heard that there is an ATM in Lukla as well, but we did not see it when we were there and cannot confirm it.
Bringing Cash from Kathmandu
We strongly advise you to bring cash for your entire trek with you from Kathmandu. The optimal solution is to bring cash with you from your home country and exchange it in Kathmandu. There are several money changers in Thamel, and using Google Maps, you should be able to find one with good reviews and fair rates.
Unfortunately, you are not allowed to have nepalese rupees outside of Nepal. Thus, exchanging money before you arrive at Kathmandu is not an option.
Tips for Saving Money
Compared to most other long-distance treks, and considering the comfort and quality of food on this trek, we would argue that it is a quite cheap trip. However, if you are on a tight budget, there are some things you can do to reduce the cost of your trip:
- Eat your meals at the guesthouse you sleep in. If you eat your meals outside of your guesthouse, you will typically be charged significantly more for your room. Hence, the easiest way to save money is to simply eat where you sleep.
- Treat the water (do not buy bottled water). Treating the water with tablets, a filter, or a Steripen is not only better for the environment, but it will also save you a great deal of money.
- Bring snacks from home (or buy them in Kathmandu). This is obviously a trade-off, since bringing snacks for your entire trek would result in a very heavy backpack. But considering that a Snickers will set you back 800 npr in Gorakshep (it was probably brought up there by either a yak or a human!), your wallet will thank you for bringing snacks for at least the first few days.
- Bring your own tea (or buy it in Kathmandu). You can save a few bucks by buying hot water instead of tea. If you drink tea daily, that will add up during your trek.
- Hike to Lukla instead of flying. Bus tickets are cheap in Nepal, and if you have the time, you might consider taking the bus to Jiri or Salleri and hike to Lukla instead of flying.
Resources
- Apps for navigation: Maps.me, Guru Maps, and Gaia GPS (links for iOS).
- Lonely Planet Guidebook Trekking in the Nepal Himalaya (2015 edition).
- Cicerone Guidebook Everest. A Trekker’s Guide (2023 edition).
- Everest Base Camp Facebook Group for up-to-date information, recommendations, and questions about your trek.
- Information about visa and permits: Nepal Tourism Board.
- Carry Me Back initiative to reduce waste in the Everest Region.
Related posts
Gosainkunda Trek