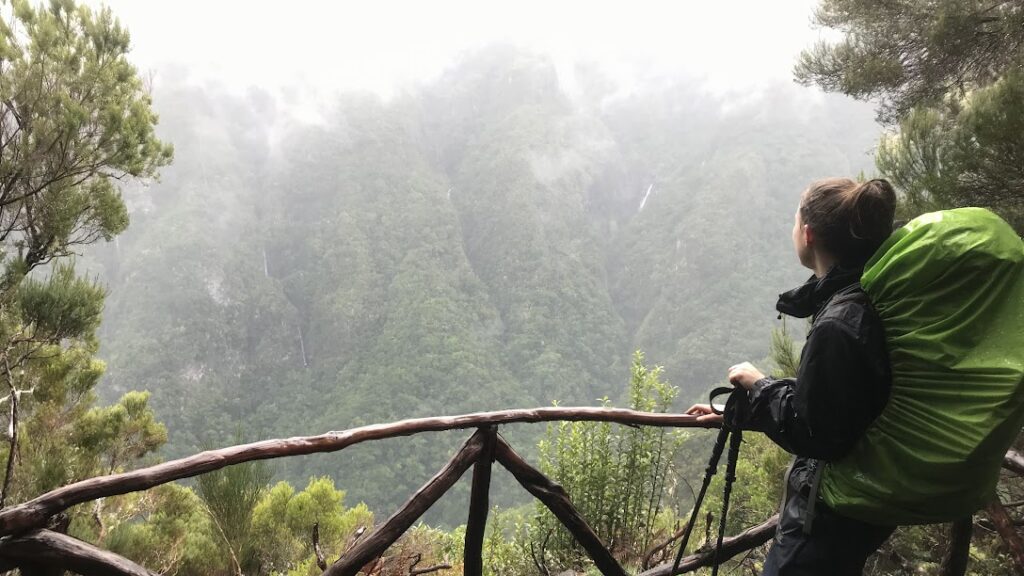
Every year, thousands of athletes embark on the challenging Madeira Island Ultra Trail (MIUT) – and for good reason! Running 115 km across the volcanic island, the trail passes through an unbelievable variety of landscapes. Since we have not yet converted to trail runnning, we decided to hike the route instead. Little did we know that we were about to embark on one of the most beautiful treks we have ever been on.
On this trail, you will cross the entire island of Madeira from west to east coast. On the way, you will encounter deep tropical forests, rigged mountain ranges, wide grasslands, and steep coasts. All of this due to the fact that Madeira, despite its humble size, contains several micro climates. This also means that you might hike in snow in the morning and be able to tan at the beach in the afternoon!
In this guide, we provide you with the information we gathered from our MIUT hike in 2021. We cover how to book camping sites, where to find food and water, and how you can navigate the trail. Hopefully, this will be helpful if you consider undertaking this amazing hiking adventure yourself!
Table of Contents
ToggleMadeira Island Ultra Trail: Quick Stats
Distance
102 km
Starting point
Porto Moniz
Total elevation
7,700 m
End point
Machico
Duration
6 days
Accommodation
Camping
Map
What to Expect
The nature you will encounter on this trek is simply astonishing – not at least due to its incredible variety. You will come across such different landscapes that it is hard to believe that you are indeed still on the same island. To give you a taste, here are a short introduction to some of the terrains you will step into:
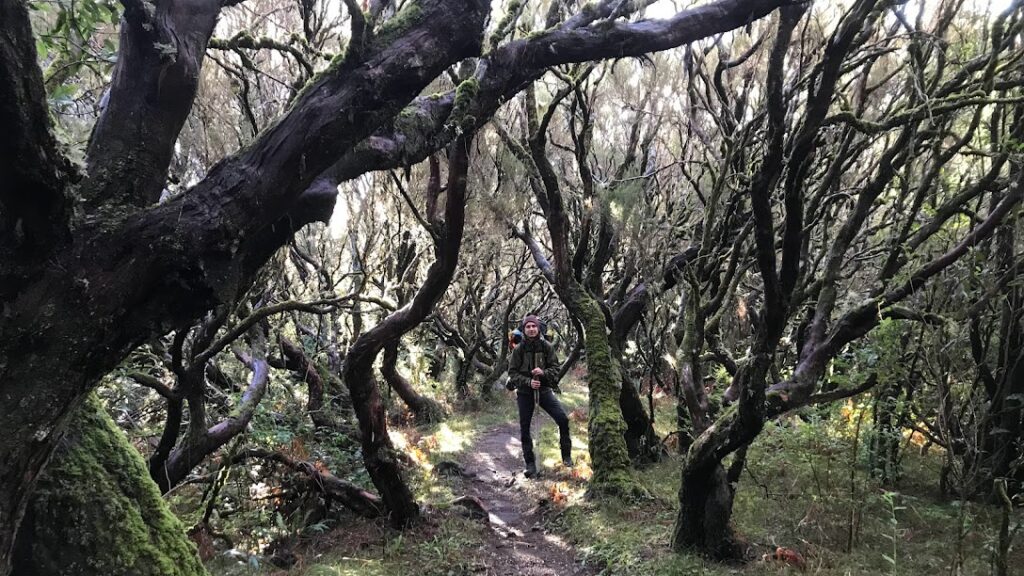
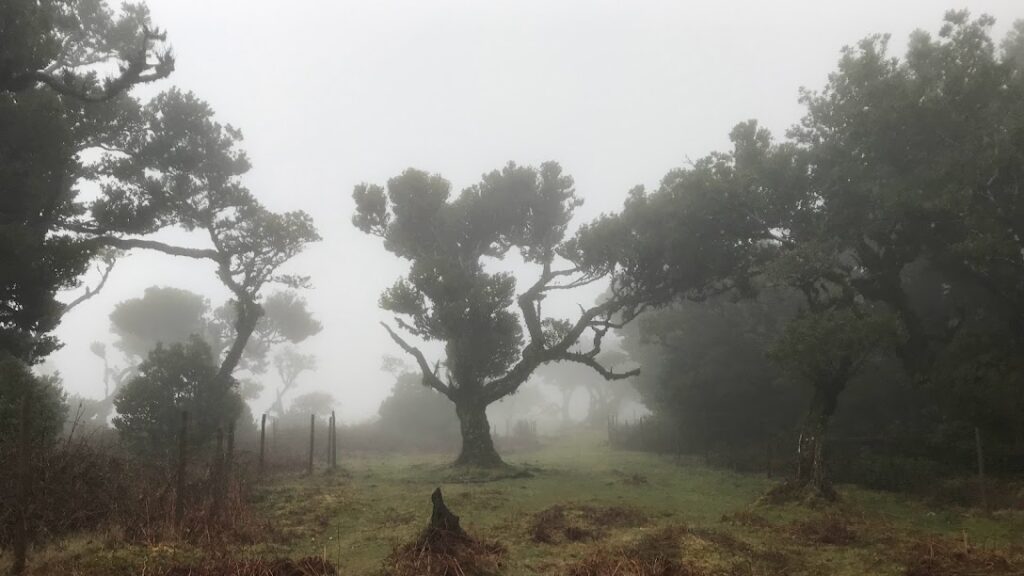
Fanal Forest
On this trail, you will hike through the ancient, crooked trees in the forest of Fanal. The forest is often embedded in a thick fog that gives it a mystical vibe.
Madeira’s Highest Peak
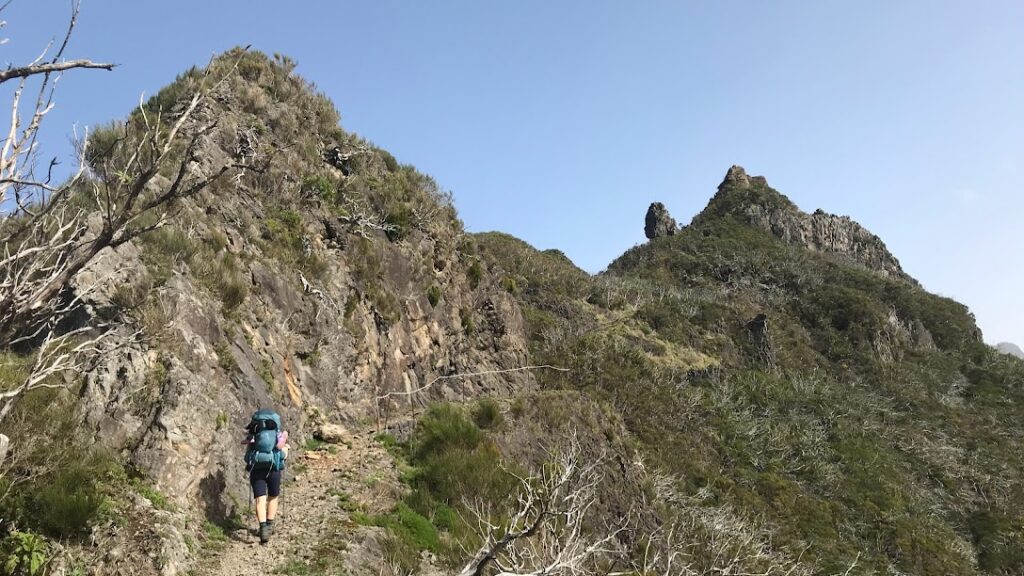
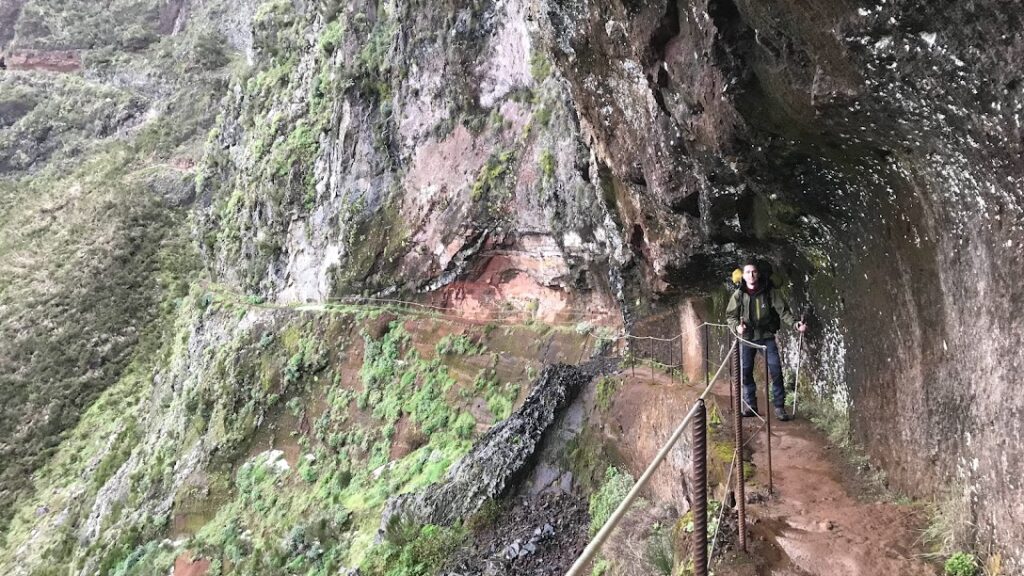
The landscape becomes more barren as you gain altitude on your way towards the highest mountain range on Madeira. The trail passes Pico Ruivo (1,861 m), Madeira’s highest peak, and curls along steep mountain sides. Some places you even have to trek through 100 meter long tunnels through the mountains!
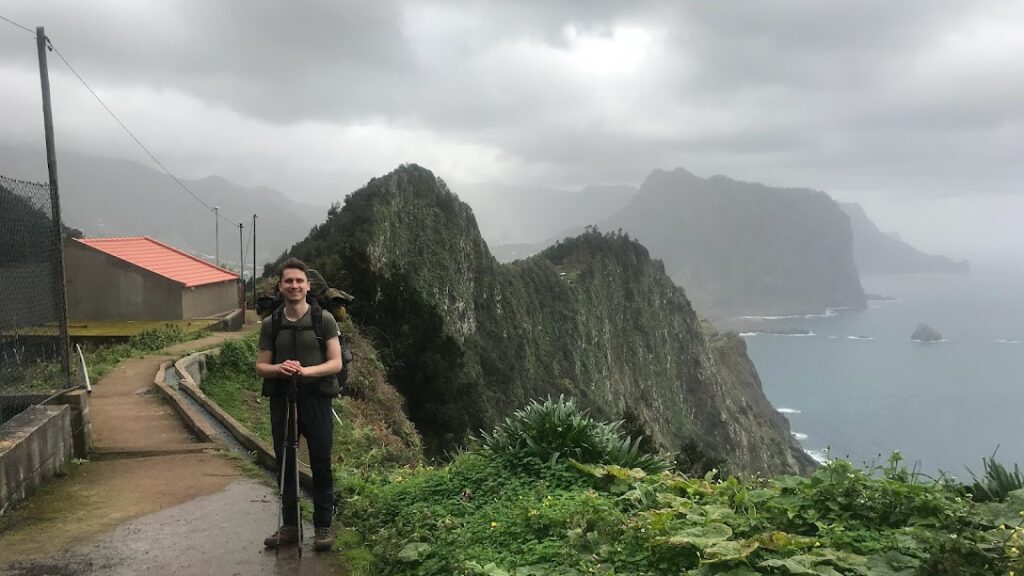
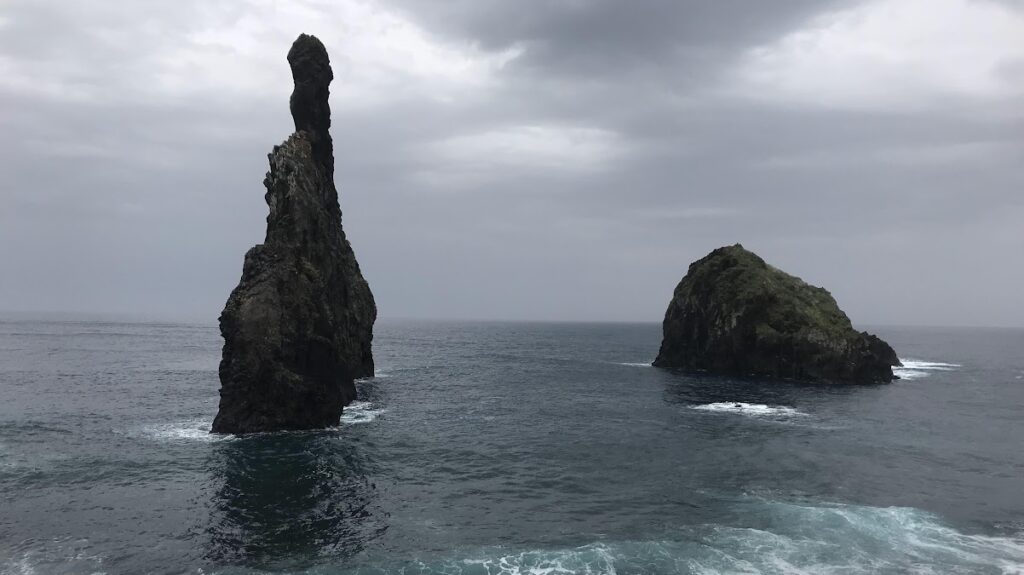
Black Coastline
While most of the trail runs inland, you will also trek along the dramatic, black coastline of Madeira. The ridges drops steeply into the ocean on the island’s north coast.
Levada Walks
You will even walk on Madeira’s famous levadas, the arqueducts that supply the lower-laying cities with fresh water from the mountains.
How Difficult is MIUT?
The trail is moderately difficult with steep (and potentially slippery) sections and narrow paths. However, it is not of techincal difficulty, and there are no climbing passages or ropes involved. The challenge of MIUT lies in the fact that it is not an official hiking route. This means that the trail is not marked, and there are limited options for accommodation on the way. You will have to be self-sufficient in regards to food, comfortable with tent camping, and able to navigate unmarked terrain.
A guide is not officially required for hiking in Madeira, but we recommend you hiring a local trekking guide if you are not completely comfortable in all of these aspects.
When to Hike
Due to Madeira’s subtropical climate, the trek is accessible year-round. However, you might want to avoid the heat of the summer months and the rain of winter. Early spring or late fall is the best time to tackle the trail if you want to minimise your chances of rain.
With that being said, the many micro climates of the island mean that you must be prepared for any kind of weather no matter what time of year you go. It is very likely that you will encounter rain while trekking on the Northern side of the island and sun on the Southern side.
We went on this trip at the end of January and enjoyed the cool temperature of around 15-20°C. We experienced the heating sun, heavy rainfall, and a dash of snow on our trek and truly enjoyed the changes of weather.
Our Itinerary
We hiked the trail in 6 days (5 nights). Some of our days were pretty long, and if you have more time on your hand, we suggest you split the trip into more stages. That way, you will be able to enjoy the trek and and take in the scenery even more.
Day | Destination | Time (hours) | Distance (km) | Ascent (m) | Descent (m) |
|---|---|---|---|---|---|
1 | Porto Moniz ➞ Camp Fanal | 7 | 14.5 | 1600 | 450 |
2 | Camp Estanquinhos | 8 | 16 | 1500 | 1100 |
3 | Hotel Encumeada | 5 | 15 | ||
4 | Camp Pico Ruivo | 5 | 12 | ||
5 | Camp Terreiros | 6 | 21 | ||
6 | Machico | 7 | 23.5 |
Getting to the Trail and Back
The easiest way to get to Madeira is by flying to its capital city, Funchal. Since Madeira lies around 500 km west of the North African coast and 1000 km from south of Europe, sailing from one of these points is the only alternative means of transport. It might be more difficult to plan, but if you have the will and the time, it is definitely doable.
Getting to Porto Moniz
Getting to the trail head means getting to the west coastal village of Porto Moniz. From Funchal, you can reach Porto Moniz by bus or taxi. The trip here is truly gorgeous as you cross through various landscapes on your way across the island. It makes for a lovely transition from the buzy, populated city to the peaceful, yet wild and rugged coastside.
Funchal ➞ Porto Moniz by Taxi
Taking a taxi from Funchal is the fastest and most convenient option. The ride takes around 45 minutes. You can arrange a taxi through your hotel or simply grab one on the street. Depending on your bargaining skills, the trip costs around 40€.
Funchal ➞ Porto Moniz by Bus
Bus 139 drives from Funchal to Porto Moniz three times a day. Ask your hotel for the (updated) bus schedule and the nearest bus stop.The trip takes about 3 hours due to a long break in the middle of the ride. A one-way ticket costs around 5€, making the bus a very budget-friendly option.

Getting Back from Machico
The trail finishes in Machico, a cozy town at the east side of Madeira. It is a lovely place to spend a night and take a cooling dip in the ocean. Machico has one of the only sanded beaches in Madeira, and the sand is said to be imported from the Sahara Dessert! Getting to Funchal is a short and easy trip either by bus or taxi.
Machico ➞ Funchal by Taxi
Getting a taxi to Funchal is easy and quick. The ride takes 20-30 minutes depending on traffic and costs around 20€.
Machico ➞ Funchal by Bus
There are several busses to Funchal running all day. The trip costs around 3€ and takes between 30-60 minutes depending on which bus you catch.
Sleeping
Camping
Sleeping along the trek is made easy by all the free campsites that Madeira’s authorities have put up across the island. There are several campsites along the trek, making it possible to sleep at one every night. If you don’t mind carrying and sleeping in a tent, this makes for a very affordable option!
Note that you have to obtain permission to camp at each campsite. You can get your camping license by booking each campsite through Madeira’s online booking system. You will receive a written confirmation that you have to carry on the trek in case you are asked to present it to some of Madeira’s Forest Guards.
Campsite Facilities
The campsites are quite simple, but they have everything you need for a basic stay. Besides a grass field for tents, all campsites have a faucet or a nearby spring with drinking water and a garbage can. Most campsites do not have toilets though, so remember to follow the Leave No Trace Principles.
Some places have a small shelter for cooking and a fire pit. If you wish to make a fire, you will have to carry your own firewood. Remember to always check whether a fire prohibition is in state before firing up!
Hotel Accommodation
We have not researched the possibility of staying at hotels throughout the trek. However, with proper planning and potential detours, it could be possible to sleep in hotels throughout the trek and avoid carrying a tent.
What We Did
On our trip, we mostly slept at the campsites. After having had so much rain in our first two days, we spontaneously decided to stay at Hotel Encumeada for our third night. We got to dry our wet gear and even had a nice dinner at their lovely restaurant!
We also spend one night in the hut on top of Pico Ruivo. The hut offers simple rooms at a fair rate. You can take the chance and show up without a reservation (that’s what we did), or you can contact the hut through their website.

Drinking Water
Drinking water can be found at all campsites throughout the trek, making it easy to stock up on water. Additionately, there are several waterfalls and springs along the way. Remember to always treat the water, unless it is specifically stated that the water is safe to drink.
We filled our bottles with 2-3 liters every morning, which was typically plenty to last us until we reached our campsite for the night.
Food
In general, you have to be self-sufficient and carry food for the entire trail as there are no shops directly on the route. However, with a bit of planning, we’re sure it’s possible to add some detours to reach small shops and resupply.
With that said, there are a couple of options to buy snacks and eat out on the way. On the fourth day, you will pass by the restaurant “Cafeteria Pico Areiro” close to Pico Areiro. While meals are expensive here, it is a refreshing alternative to trek food. You can restock on snacks here.
Hotel Encumeada, which is only a small detour on your way from Estanquinos, serves meals all day. You might also be able to eat at a restaurant in the small towns of Ribeira da Janela and Seixal which you pass through on the first two days.
Note that the hut at the top of Pico Ruivo doesn’t serve meals in the evening. They do, however, have a small selection of snacks.
Navigating the Trail
Since MIUT is not an official trekking route, there are no guidebooks describing the trail. The route is not marked, and the entire trail is not visible on physical maps. Hence, it is important to have navigation skills as well as proper knowledge about the trail before going.
Physical Map
Kompass has a 1:50 000 map that features a large section of the trail. You can buy the map here. Using the map we have provided on this page, you can draw in the approximate route on your physical map before setting out.
GPX File
You can also use a navigation app such as Maps.me, Alltrails or Guru Map where the trails are featured. We have also provided the GPX-file for our trek here. Remember to download the map of Madeira to make it available offline before you set off in case you don’t have signal on the entire trek.
Resources
- Buy Kompass map of Madeira (scale 1:50 000)
- Book your campsites here.
- Find opening hours and contact information on Pico Ruivo hut.
- Read more about MIUT on its official website.
- Apps for navigation: Maps.me, Guru Maps, and Gaia GPS (links for iOS).
Day-to-Day Details
Day 1: Porto Moniz ➞ Fanal (14.5 km, 7 hours)
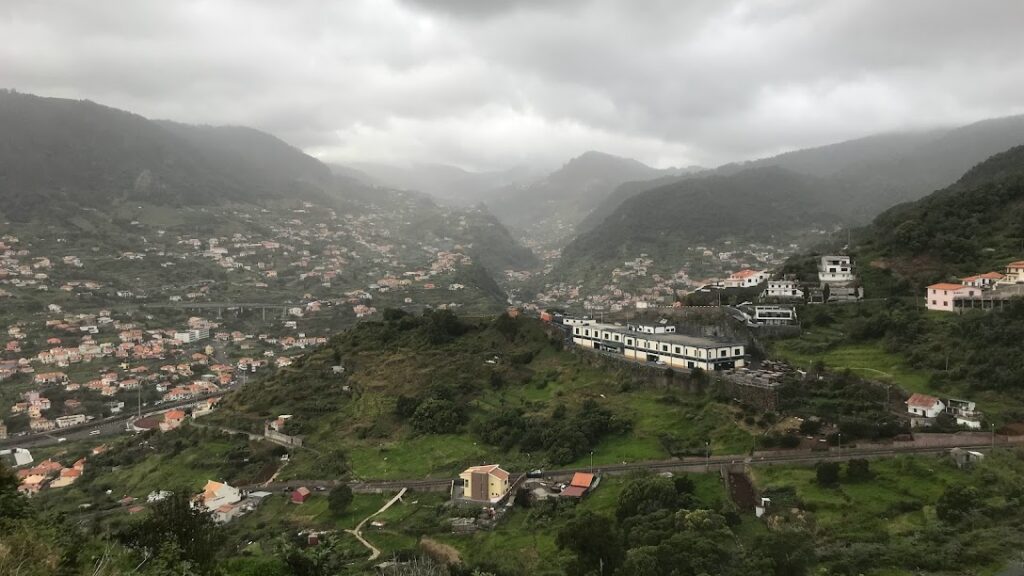
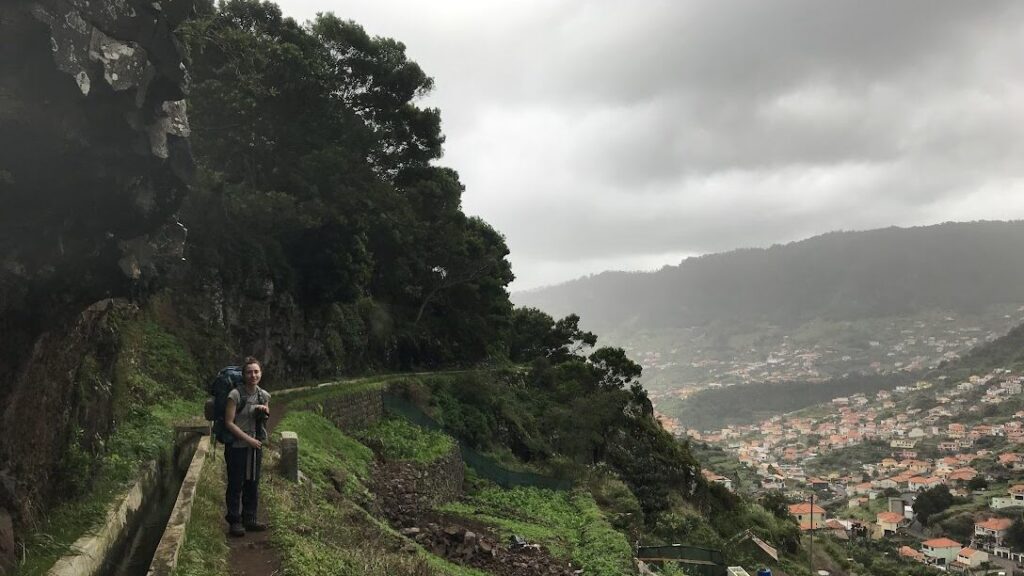
Before embarking on the trail, take a moment to admire the steep coastline made of black volcanic stone in Porto Moniz. Beginning with a steep climb on narrow streets, the view quickly opens up over the ocean. After a couple hours of ascent, the trail flattens and passes by charming houses and green fields. Soon, the path winds down the other side of the mountain following the first levada of the trek! The steep descent takes you to the small town of Ribera da Janela.
Once you reach the village, another ascent awaits. The path continues into a lush tropical forest with huge lianas and body-sized tree leaves! Here, the trail follows multiple levadas and narrow paths. On our trek, it started to rain in the afternoon, and when we finally reached Fanal after a long and tiring day, we were completely embedded in a cloud. We didn’t get to see much of the supposedly beautiful forest of Fanal this day, but the fog gave the forest a cool, eerie vibe!
Day 2: Fanal ➞ Estanquinhos (16 km, 8 hours)
Today’s route begins with a walk through Fanal that gives you plenty of time to take in the age-old forest. Walking across a plateau, the trail passes by many wonderful viewpoints before reaching a crooked, dense forest. Soon, a steep descent towards Seixal begins. Though this part might be rough on the knees, the views on the way down are magnificent and all worth it. Notice all the waterfalls covering the moutains on the other side of the valley!
Reaching Seixal, you have the option of having lunch in one of the few restaurants on the way. There is also a small shop in the village that you can reach on a small detour.On the other side of the valley, the trail begins climbing on a seemingly infinite amount of stairs. Nearing the top, the path levels and widens, leading through a densely packed coniferous forest.
The campsite of Estanquinhos appears close to a small house. Descent the narrow trail through the forest for a bit and you will find running water (remember to treat it before drinking).
Day 3: Estanquinhos ➞ Hotel Encumeada (15 km, 5 hours)
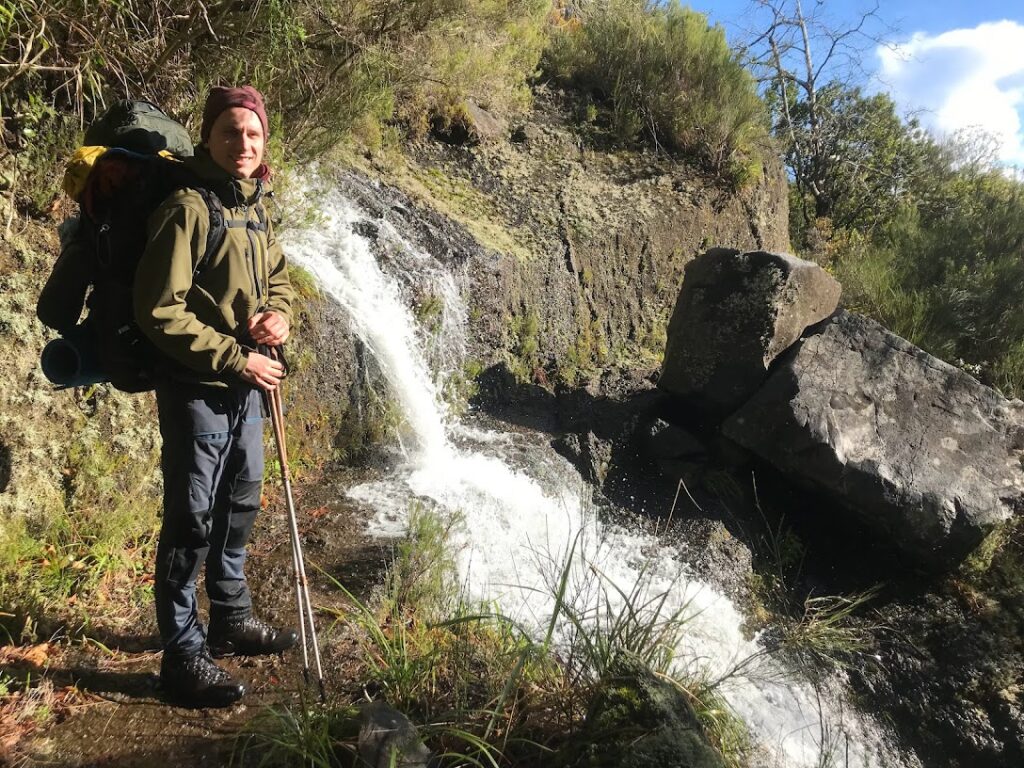
This day is considerably less tough compared to the two first days, but no less beautiful. Starting with a gentle descent on a jeep track, you will soon reach another lovely forest. After a couple hours of walking, the trail follows the side of a mountain with incredible views and several waterfalls to cross. The surrounding vegetation is green and lush, making this part of the trail one of our favorite sections. There are even some short tunnels to pass through, giving you a taste of what is to come on day 4 (spoiler: it is – surprise – longer tunnels).
Further descending the trail, you will reach Vargem, another charming village. There is a small supermarket 4 km north of the trail if you need to stock up on supplies. Continuing, the path winds through more dense forest. It is not too long before you reach the campsite Chäo dos Louros. The campsite is not placed directly on the trail, so you will need to turn left on road 228 and walk about 10 min before reaching a small path to the left leading to the campsite. There is water and toilets here.
We decided to continue towards Hotel Encumeada to spend a night here while drying all our wet gear. This involves a small detour on the road if you follow our track (the hotel is on the way on the official MIUT).
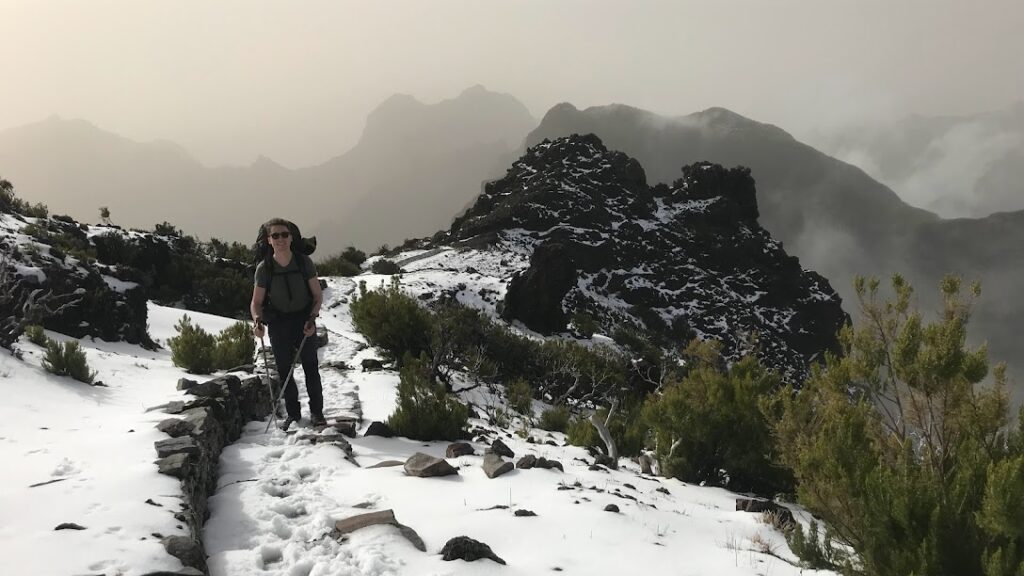
Day 4: Hotel Encumeada ➞ Pico Ruivo (12 km, 5 hours)
As we already explained, this day differs from the official MIUT due to the track being closed at the time of our visit. Following our itinerary, you have to backtrack from Hotel Encumeado until you reach road 228. From here, the track follows the ridgeline towards Pico Ruivo. The views are absolutely stunning all the way so take your time to stop and take it all in. The going is not particularly tough, but the trail climbs slowly for hours. If the weather gods are with you, you will soon be able to see Pico Ruivo and your final destination for the day.
Pico Ruivo itself is only a short detour from the trail and from here, you will have incredible views on a clear day. You can decide to pitch your tent at the campsite right before the turn right towards the top, or you can spend a night at the small mountain hut Casa de Abrigo. The hut is primitive but provides shelter in bad weather. You can buy snacks here and use the kitchen for preparing your food. Water can be found outside the hut.
Day 5: Pico Ruivo ➞ Terreiros (21 km, 6 hours)
This day is arguably the most difficult with several tunnels to pass through (don’t forget a headlamp or a torch!) and steep cliffs to walk along. It is great fun, and you will be rewarded with beautiful views all the way.
Following the rugged path away from Pico Ruivo, the trail winds up and down the mountain ridge towards Pico do Arieiro. After 1-2 hours of walking, you might begin to meet people hiking the opposite way as this is a very popular one-day trek. Towards Pico do Arieiro, the path is replaced by steps and you will have gorgeous drops on both sides. At Pico do Arieiro, there is a cafe with a selection of snacks to buy.
After Pico do Arieiro, you leave the tall mountains behind and the landscape opens up with broad fields. The flat landscape makes for an easy going in the afternoon. After a couple of hours, you reach the small area Ribeiro Frio where it’s possible to set up camp for the night. We did not check for water here as we decided to continue on, but if you follow the road towards the church and the cafes, you might find some here.
Alternatively, you can continue towards Terreiros, which is about 1½ hour away through forests and fields. The campsite is quite big, and you will find water close to the road (but no toilets here).
Day 6: Terreiros ➞ Machico (23.5 km, 7 hours)
The last day of hiking is long and varied – and you will once again reach the ocean! From Terreiros, follow the path along forests and levadas until you reach Portela. Here, you will have to follow the road for a short bit before turning towards more forest. A steep descent awaits before you reach the northern coast. Here, the trek turns east and follows a beautiful track along the coastline with dramatic drops. You will follow this track for about 2 hours before turning south towards Machico.
Soon, you will start to see houses and roads as you get closer to civilization. There are several levadas to follow, making for a great last day. Descending for a couple of hours, you will reach Machico and be able to celebrate your achievement with a swim in the ocean or a cold beer by the beach! You can either stay in the lovely town for the night or head back to Funchal only an hour away.