When Tenzing Norgay and Edmund Hillary became the first people to summit Mount Everest in 1953, there was really only one way for them to reach Lukla, the entrance gate to Everest: They had to walk all the way from Kathmandu. Thankfully, there are now several quicker options to get to Lukla with flying being the most popular one. Following the footsteps of Norgay and Hillary, you can also reach Lukla by walking in from Jiri.
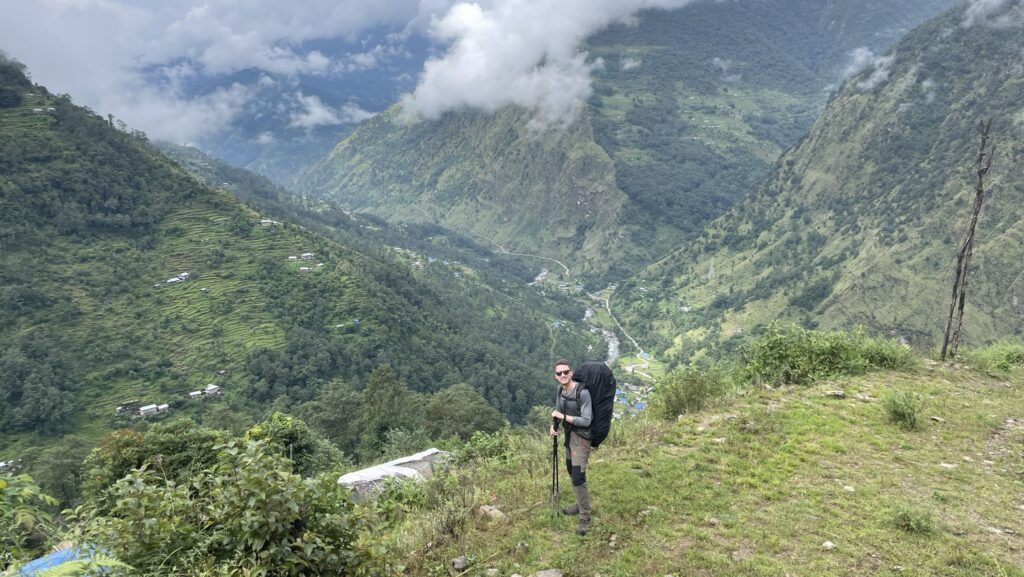
This trail presents a great alternative for those who seek a quiet, authentic hiking experience in the beautiful green nature of the lower Himalayas.
On the way, you will get to enjoy the hospitality of the incredible local people, eat deliciously fresh vegetables straight from the garden, and peek at the large ranges of the high Himalayan mountains from a distance. For us, it was the perfect peaceful start of our Three Passes Trek, and we really cannot recommend this route enough.
In this post, we cover all you need to know to plan your trek from Jiri to Lukla. We will try to answers questions like how to get to the trail head, what to bring, where to sleep and eat, and how much the trek will cost.
Table of Contents
ToggleJiri to Lukla: The Quick Stats
Distance
85 km
Starting point
Jiri
Total elevation
7200 m
End point
Lukla or Chaurikharka
Duration
6-8 days
Accommodation
Teahouses
Map
What to Expect
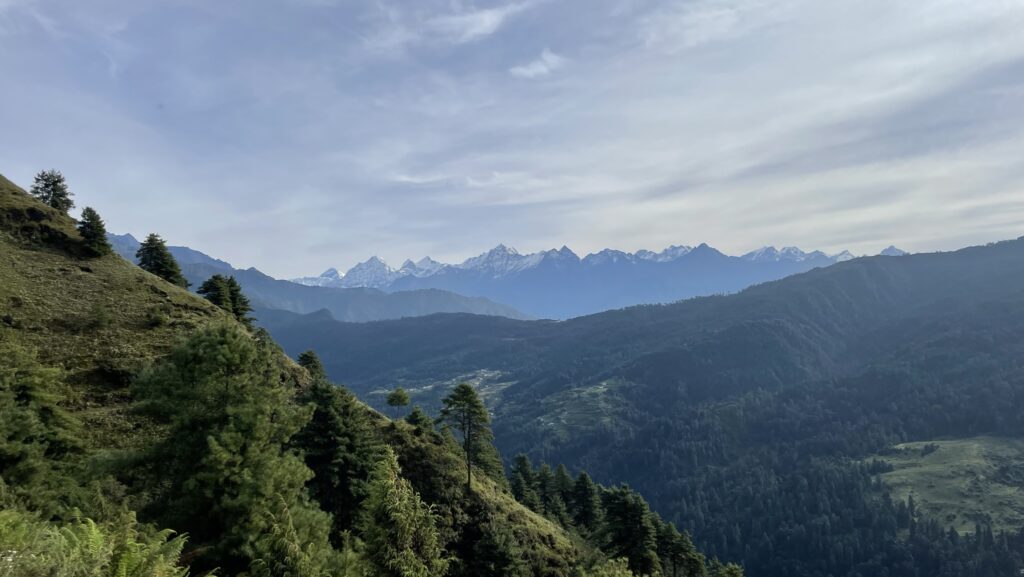
Peek at the Highest Peaks on Earth
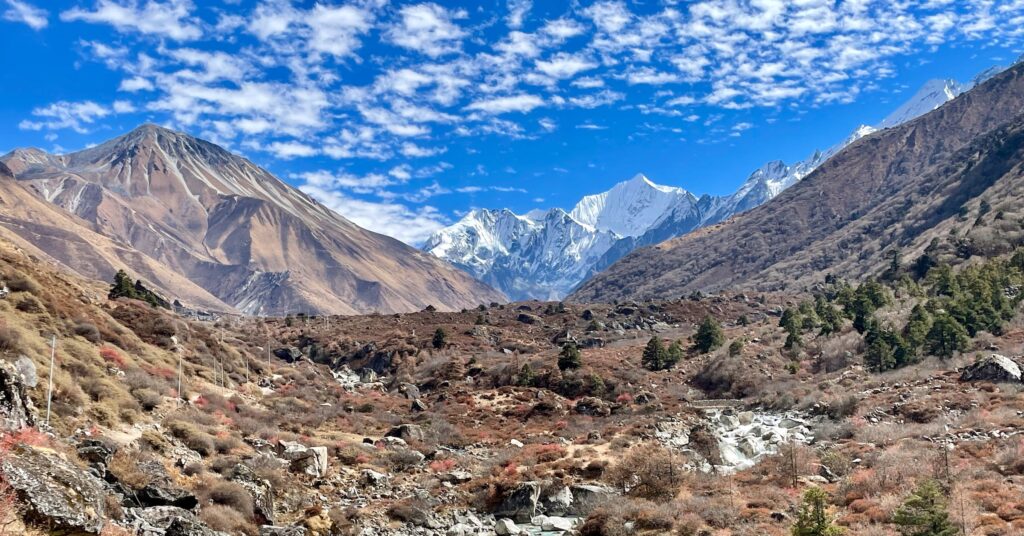
On this trail, you will have beautiful views of Mount Everest (8,848 m) and the surrounding mountains from a distance. It is nothing short of marvelous when you have hiked for multiple days in the greenery and suddenly see those snow capped mountains in the horizon.
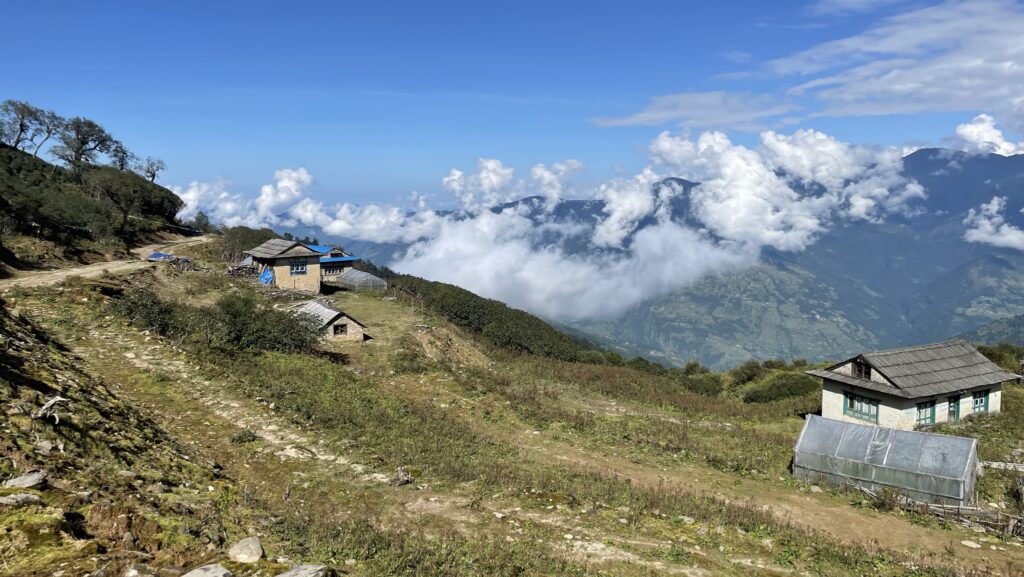
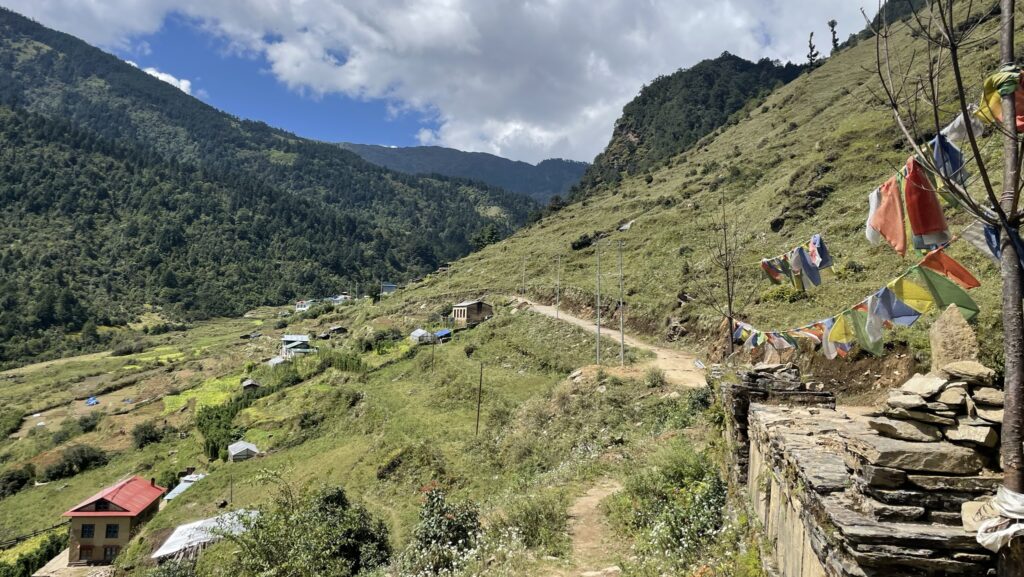
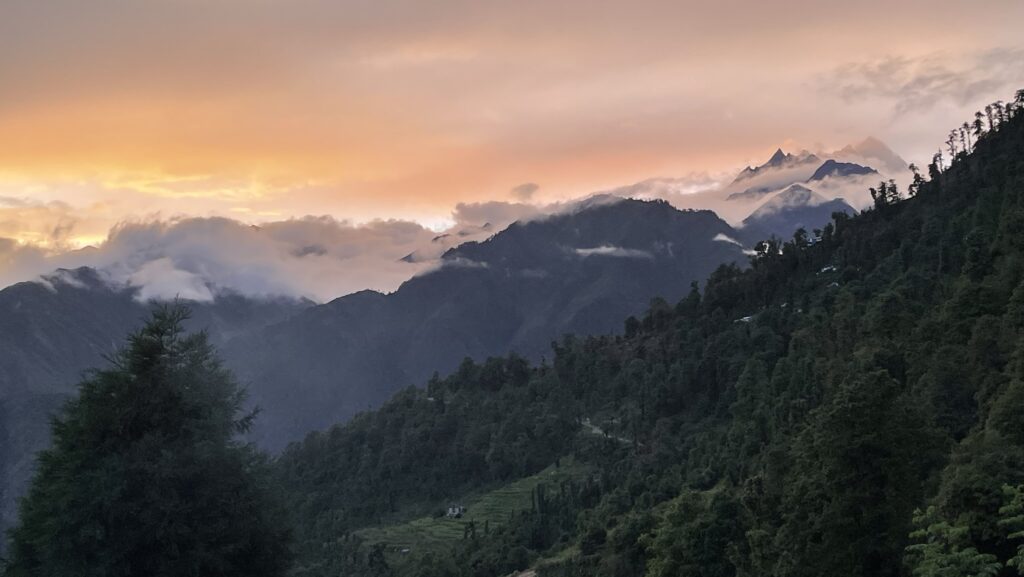
Green Rainforest
The landscape on this trek is very different from that of high altitude trails such as Three Passes Trek or Langtang Valley Trek (LINKS). In the lower Himalayas, the mountains are covered in thick forest, the air is humid, and it is not uncommen to run into a pumpkin or a chayote hanging above you on the trail from one of the surrounding farms.
Sherpa Culture
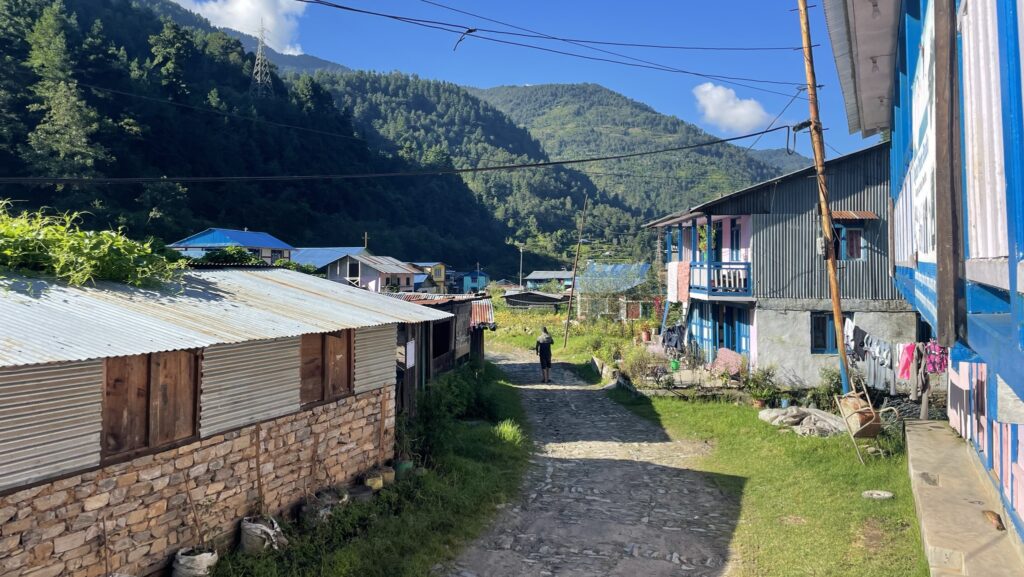
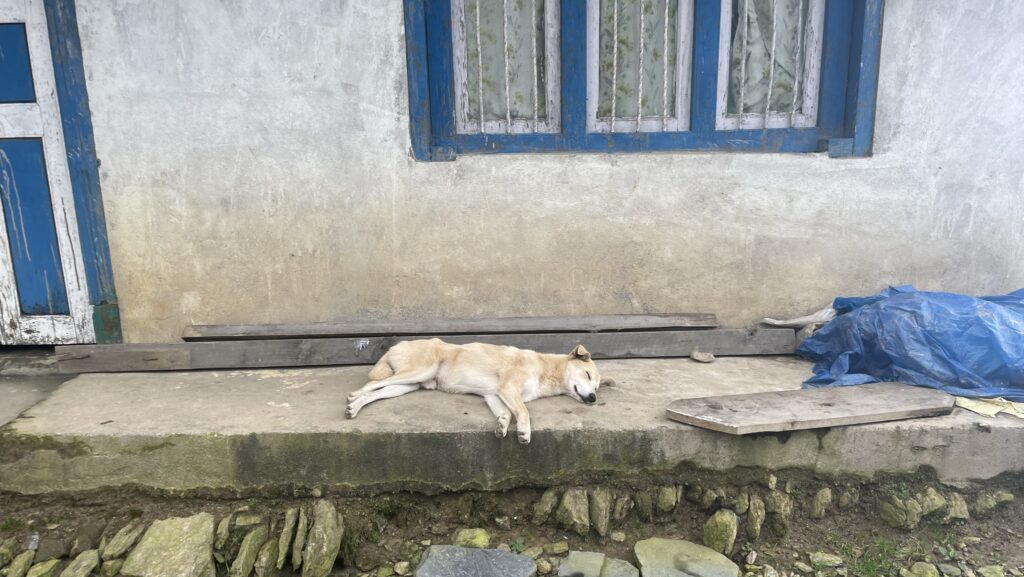
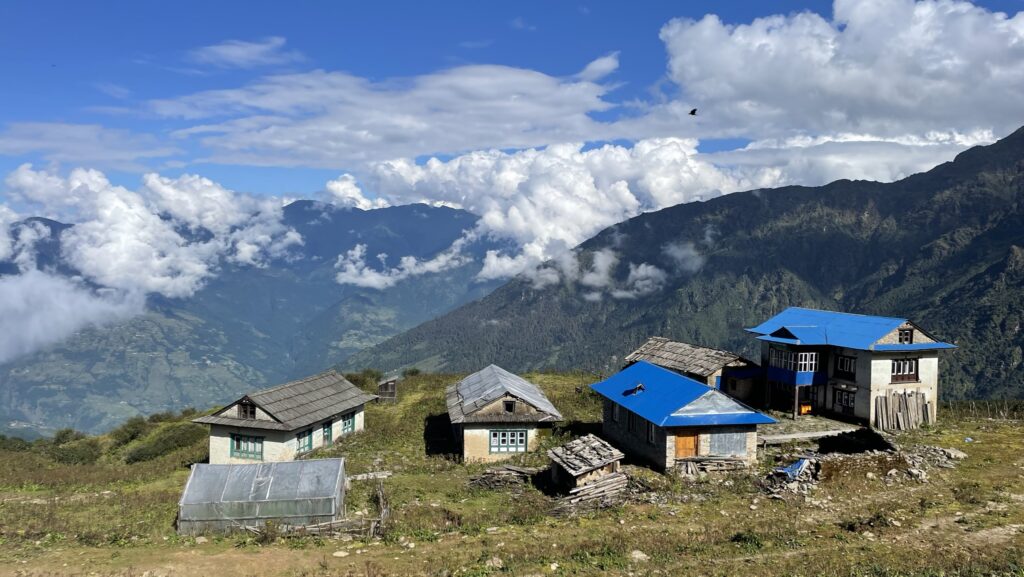
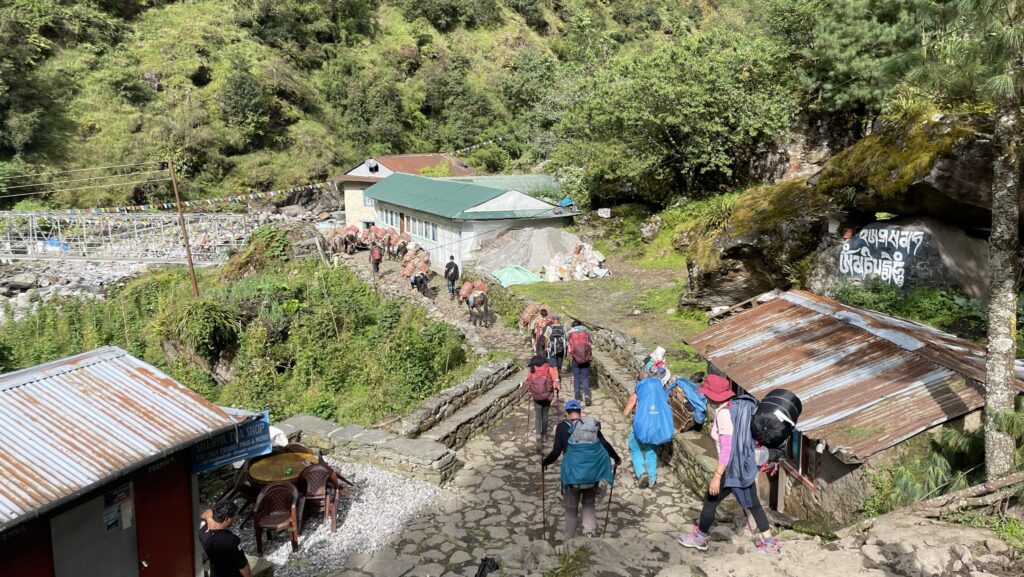
Along the trek, you have plenty of opportunity to stay at local teahouses. Here, you will get a close encounter with the Nepalese people as well as their cultures and traditions. You will soon discover how friendly and welcoming these people are, and you might make friends for life here.
Peaceful Trail
This route is way less popular than other trails in Nepal which makes it a perfect choice if you wish to go on a quiet hike. Personally, we found the remoteness and peacefulness of this trek amazing but we were also happy to meet 2-3 people each day to talk and share a meal with.
How Difficult is this Trek?
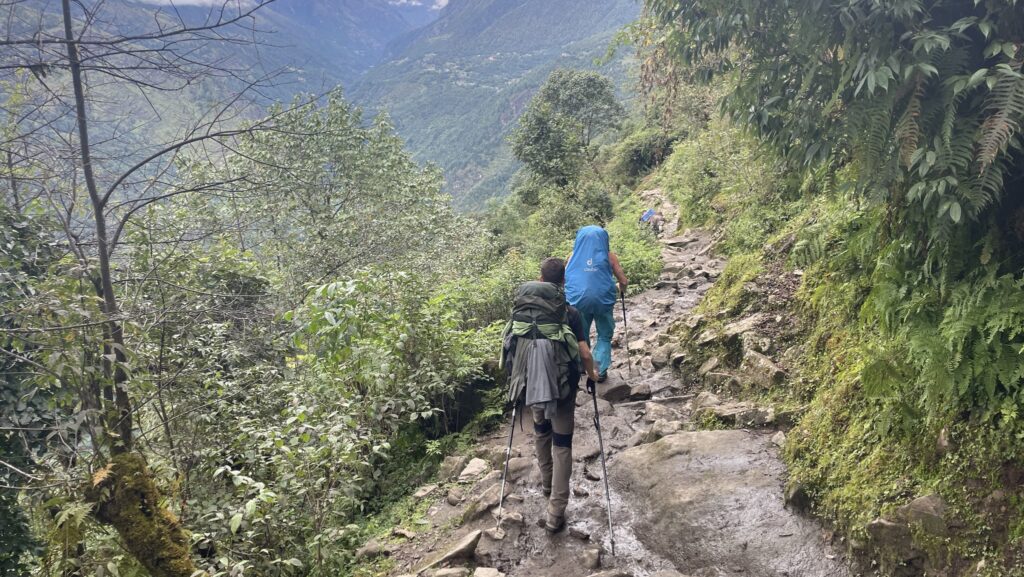
Terrain
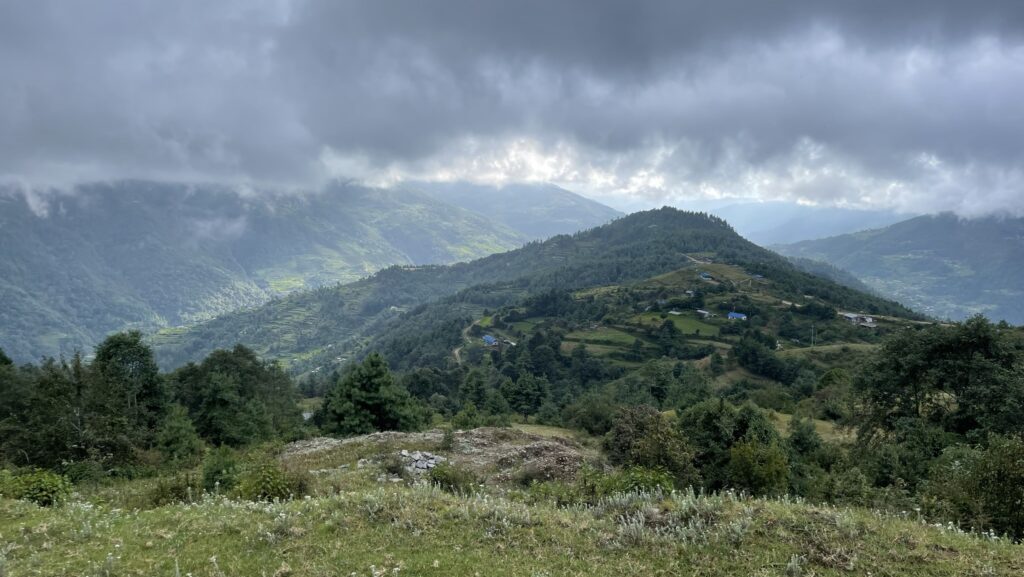
We consider the Jiri to Lukla Trek a moderately difficult hike. Though the route does not climb over 3600 m, there are many ascents and descents requiring a fair level of fitness. In fact, not taking into account that Three Passes Trek is at high altitude, we found the Jiri to Lukla trail to be tougher in terms of how physically demanding it is!
Navigation
Route finding on this trek can be a bit tricky as there are few signs and marks along the way. Compared to the high altitude treks, this trek does not see many visitors, so you have to be more self-reliant. With that being said, the local people know the terrain like the back of their hand and are more than happy to help pointing you in the right direction.
Weather
As always, when it comes to the mountains, weather can be unpredictable. Afternoon showers and thunder storms are common, particularly during monsoon season (June – September). Make sure you bring proper rain gear.
The possibility of hiring a guide and/or a porter is a good option if you wish to do this trek but are unsure about certain aspects of it. We cover aspects of how to hire the right guide for your further on in this post.

When to Hike
Hiking from Jiri to Lukla is best done during the dry season ranging from October – May. At this time, the weather is typically more stable with limited precipitation, and the chances of clear skies are higher. If you do this trek as your entrance to Everest Base Camp or Three Passes Trek, you will have to keep in mind that the best season for these treks is October-November and April-May.
If you decide to trek in Winter, you can expect an even quieter hike. Note that rooms at the teahouses are generally not well insulated, and that trekking in Winter might require you to carry extra warm clothes and a good quality sleeping bag.
Hiking during monsoon season (June – September) is generally not advised due to the high rate of precipitation making the track wet. Besides, a myriad of leeches emerge during monsoon season, so mentally prepare yourself for this if you decide to go in Summer.
Getting to the Trail and Back
Before you start your hike, you must first get to Kathmandu, the capital city of Nepal. Most visitors stay in the part of Kathmandu called Thamel and spend a day or two here before starting trekking. Kathmandu can be reached by airplane or by bus (if you are travelling from India).
Getting to Jiri
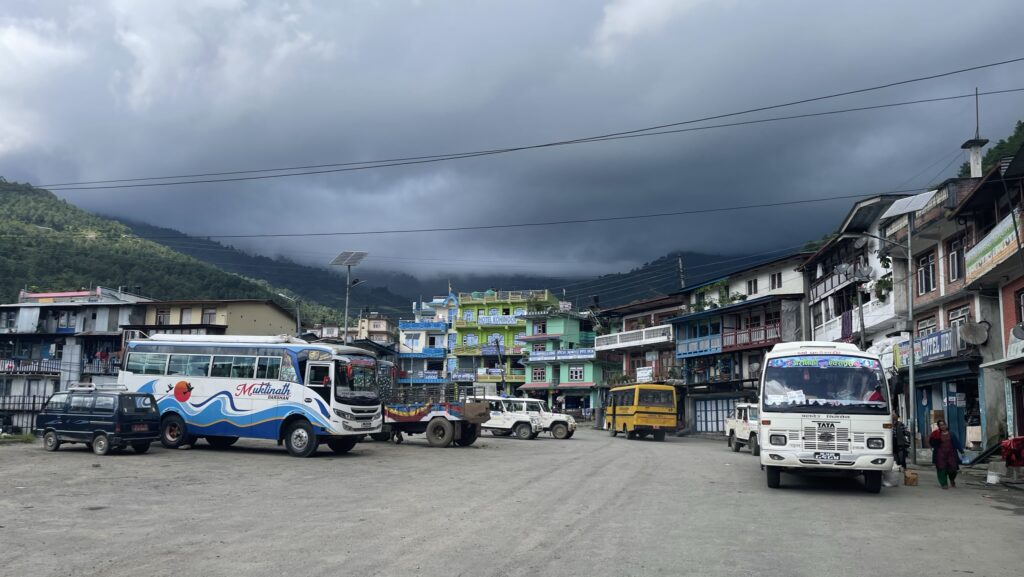
From Kathmandu, you can either take the local bus or hire a private jeep to take you to Jiri. Busses leave early in the morning from the bus station Jadibuti, and the trip takes around 7-8 hours, including a short lunch break. The ticket price depends on how much you bargain, but we paid 1000 npr ($ 7.5) per ticket in October 2023. Hiring a private jeep can be arranged through your hotel and will probably be more comfortable albeit expensive.
In our detailed guide on how to reach Lukla (LINK), you will find a detailed description of how to get to Jiri.
Getting Back from Lukla
Once you reach Lukla, there are several options for getting back to Kathmandu. You can either go by airplane or helicopter (20 min), take a jeep from Thamdanda (2 days hike from Lukla), or take the bus from Salleri (4 days hike from Lukla). In our guide on how to get to Lukla, we have provided detailed information about all these options.
Trek to Tumlingtar
If you still have more energy left after reaching Lukla, another option is to extend your trip with an additional 8 day hike to the village of Tumlingtar. This trek winds Eastwards through Makalu National Park and sees even fewer hikers than the trek from Jiri to Lukla. From Tumlingtar, you can reach Kathmandu by a combination of jeep and bus.
We planned to hike this trail after our Three Passes Trek but had to skip it due to illness. There is not much information about the trek online, but you can read about it in Lonely Planet’s Guidebook on Trekking in Nepal.
Our Itinerary
We spent a total of 7 days hiking from Jiri to Chaurikharka which lies just below the village of Lukla. If you are continuing on towards the Everest Region, you can continue on this trail and skip the ascent to Lukla. Otherwise, you will simply have to turn off to the right towards Lukla after you reach the village of Surke (just follow the signs).
Day | Destination | Time (hours) | Distance (km) | Ascent (m) | Descent (m) |
|---|---|---|---|---|---|
1 | Shivalaya (1700 m) | 3.5 | 8.8 | 560 | 700 |
2 | Kinja (1630 m) | 8 | 16 | 1240 | 1430 |
3 | Goyam (3220 m) | 5.5 | 7.5 | 1600 | 0 |
4 | Phurteng (2970 m) | 6 | 14 | 820 | 1020 |
5 | Nunthala (2150 m) | 6 | 12 | 620 | 1430 |
6 | Khare (2590 m) | 6 | 12.5 | 1260 | 870 |
7 | Chaurikharka (2619 m) or Lukla (2860 m) | 6-7 | 14-15 | 1060 | 1050 |
Permits
Officially, you are required to buy two permits for trekking from Jiri to Lukla:
- Gaurishankar Conservation Area Project Permit (3000 npr)
- Trekkers’ Information Management Systems (TIMS, 1000 npr for SAARC citizens, 2000 npr for all other foreign nationalities)
Gaurishankar Conservation Area Project Permit
You can buy this permit at the checkpoint in Shivalaya just before you enter the conservation area. You will have to show your passport to the administration office, but you don’t need to carry extra passport photos. The permit can also be obtained at the Tourist Office in Kathmandu before you start your trek.
TIMS Card
Officially, a TIMS card is required for anyone trekking in Nepal and can only be obtained at the Tourist Office in Kathmandu. You do not need to book an appointment, but you will need to bring the following:
- A copy of your passport
- 2 passport photographs
- An itinerary for your trek
Up until now, the local authorities in Solukhumbu have not checked for TIMS cards, but they might decide to do so in the future. Ask the local people in Kathmandu before you go to make sure you know what the situation is like at the time of your journey. We decided not to buy TIMS and were not once asked to show it on our trek in October 2023. But in the end, it is up to you whether you want to take the chance of going on the trail without it.
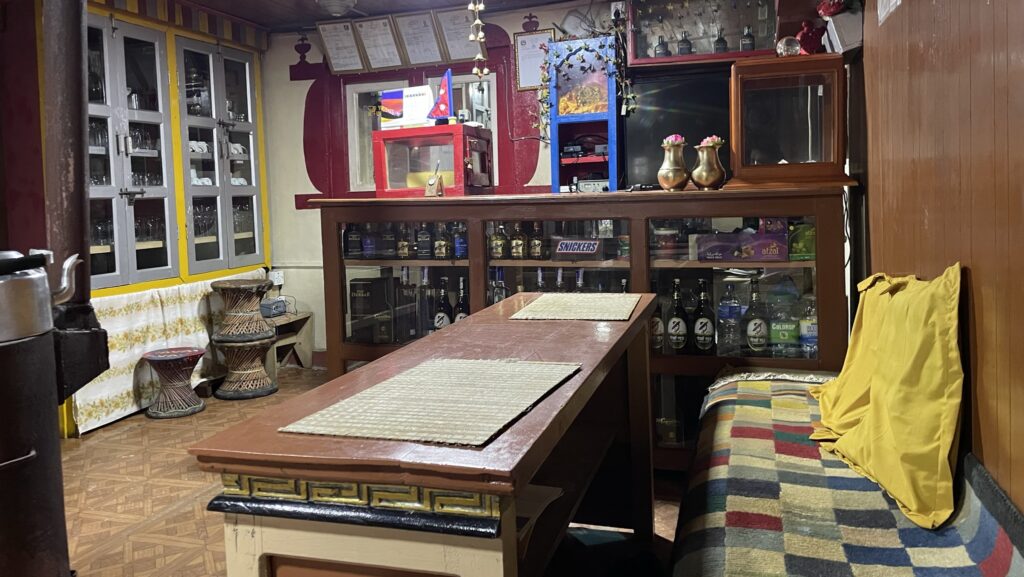
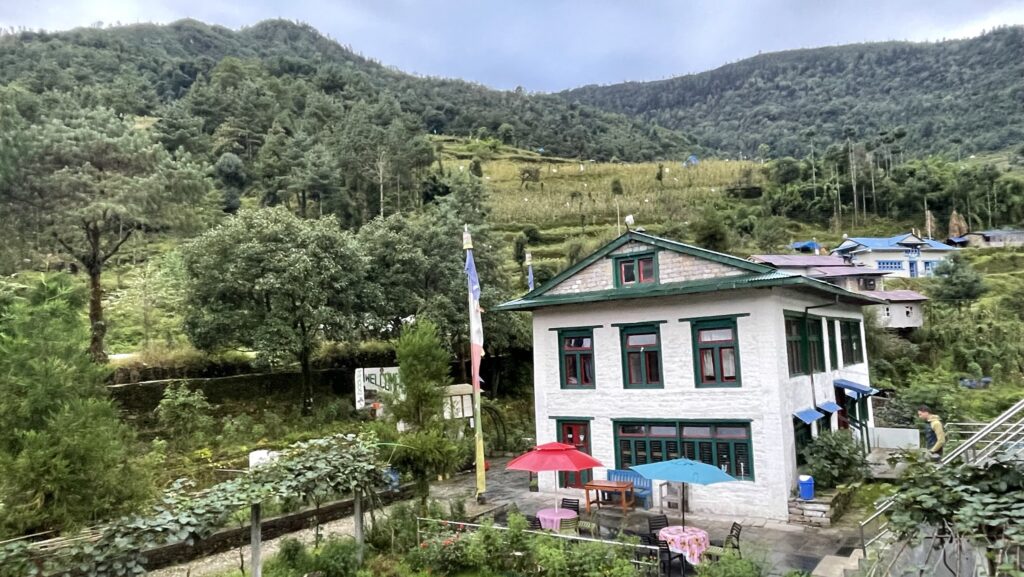
Accommodation
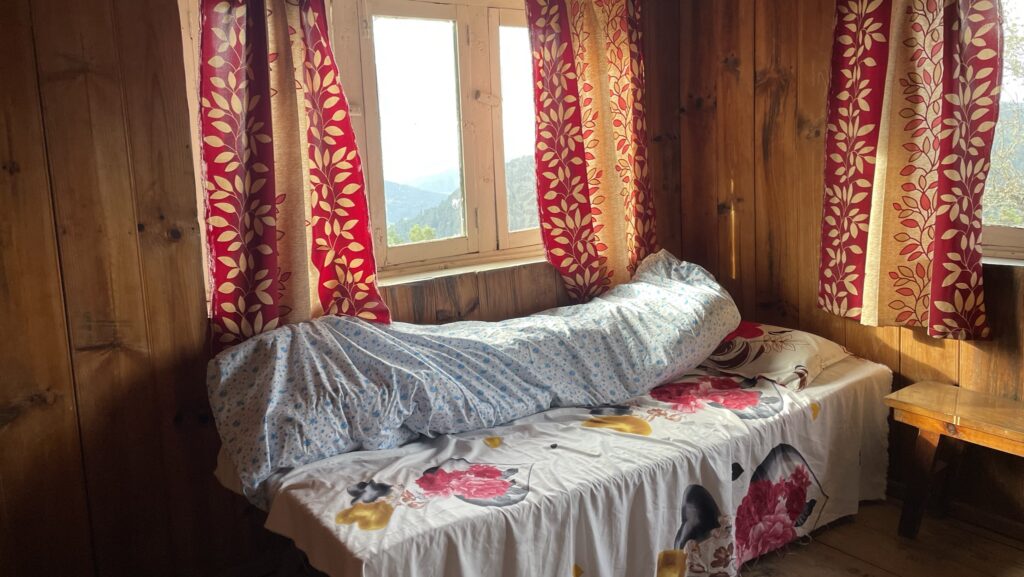
There are plenty of teahouses along Jiri to Lukla Trek for you to sleep at and enjoy home cooked meals. Teahouses are normally run by local families who have turned a section of their house into a guesthouse. They typically consist of a dining room and a selection of bedrooms. The quality of the guesthouses vary considerably, but in general, rooms tend to be basic but comfortable.
How Much Does a Room Cost?
A room usually costs between 200-500 npr ($1.5 – 3.75), and you are expected to eat dinner and breakfast at the teahouse. If you decide to eat elsewhere, the room price will be considerably higher.
What are the Rooms Like?
At most teahouses, you will be able to choose between rooms with a shared bathroom and rooms with a private bathroom. The latter tend to be a bit more expensive than the former. Generally, rooms are simple and consist of two single beds with pillows and blankets, as well as a small table. Most rooms have power plugs for you to charge your devices.
Do I Need to Make Reservations?
You do not need to make reservations for the teahouses ahead of time. In most villages, there are plenty of guesthouses to choose from, so unless you wish to stay at a specific guesthouse, you will typically not have trouble finding a place to sleep.
Drinking Water
Water is generally easily accessible throughout the trek, although you will have to treat it before drinking it. There are several streams and rivers to take from along the way, and you will always able to get water at the teahouses. To avoid getting sick, you should bring either a filter, Steripen, or tablets to treat the water with. Read more about the different ways of treating water here (LINK).
Bottled Water
You will also be able to buy bottled water in most teahouses. However, buying bottled water is highly discouraged as their production takes an unnecessary toll on the environment. Nepal has a serious problem with plastic polution, and it is not uncommon to find plastic in rivers, forests, and on the trails. With several alternatives to treating water, we encourage you to choose an option that leaves a considerably smaller environmental footprint.
Food
Since the teahouses provide home-cooked meals, you will not need to bring food or cooking gear along this trek. It is custom to eat your breakfast and dinner at the teahouse you are staying at, and you will pass at least one teahouse during the day where you can buy lunch. Teahouses tend to have rather similar menus throughout the trek. Compared to high altitude treks, the food on this route is more diverse due to the it being lower lying making food items more available.
For breakfast, you can often choose between porridge, eggs, bread, or pancakes with apple or banana. For lunch and dinner, common dishes are fried noodles, fried rice, fried potatoes, and of course dal bhat. Dal bhat is a traditional Nepalese meal consisting of cooked rice (bhat), lentil soup (dal), and a variety of side dishes such as curry or pickled vegetables. It is quite filling and makes for a perfect meal after a long, cold day of trekking. Dal bhat is usually a bit more expensive than other menu items, but unlike the other dishes, dal bhat comes with a free refill!
Internet
Most teahouses offer free WiFi, although it might be a bit unstable. For some parts of the trek, you can connect to the internet through your phone if you have a local SIM card. However, internet coverage varies considerably depending on which provider you have.
Buying a Local SIM Card
When arriving in Kathmandu, you can buy a local prepaid SIM card from providers such as Ncell or Telecom. 4 weeks of data costs between 500-1000 npr depending on how much data you require. SIM cards can easily be topped up if your data expires, or if you need it for more than 4 weeks.
Our Experience with Ncell
We bought Ncell SIM cards and were generally satisfied with our connection. It was quite on-off, and our friend who had a Telecom SIM card typically had better and more frequent connection than we did. If we were to do the trek again, we would probably bring a Telecom SIM card.
Navigating the Trail
In general, navigation on this trail can be somewhat difficult. While you will sometimes find a sign towards a village, the trail is generally not marked. To make navigating even trickier, there are several small trails that sometimes make route finding confusing. If you walk with a guide, they will know the trail and take care of all navigation. But if you decide to walk without a guide, you should be certain of your navigation skills.
Navigation Apps
You can find the trail on navigation apps such as Maps.me, Guru Maps, and Gaia GPS. Remember to download the map of the region beforehand to be able to use it offline. If you search for a GPX file for Jiri to Lukla, you will be able to find one to download which you can then add to your preferred navigation app.
Buying a Physical Map
To not solely rely on your phone for navigation, we always encourage you to carry a physical map and a compass. A physical map of the trek can be bought in one of the map or book stores in Kathmandu and costs around 600-700 npr ($ 4.5-5).
You can of course always ask the local people for directions, and in our experience, they very kind with helping us finding the right way.
Is A Guide Needed for This Trek?
Whether or not you need a guide on this trek is slightly complicated. While officially, you are required to hire a licensed guide when trekking in Nepal, in reality, the rule is yet to be enfored in the Solukhumbu area. Personally, we did not encounter any problems trekking without a guide in September-October 2023. However, the government might decide to enforce the rule without warning. To make sure you know what the situation is like today, make sure to check out the Facebook Groups Everest Base Camp or Trekking in Nepal before you go.
Keep in mind that no matter what you read on the internet, hiking without a guide despite the rules is your decision alone and is always done entirely at your own risk.
Now, legal matters aside, the decision on whether or not to hire a guide is highly individual, and several factors should be taken into account. You can read our post about hiring a guide in Nepal (LINK) for more information about things to consider when making your decision as well as tips for hiring the right guide for you.
Packing List
While the specifics on what to pack varies from person to person, some things are essential to bring for your safety and comfort on this trek.
Click here (LINK) to read our complete packing list for trekking in Nepal.
Tips for Your Trek
Now that we have covered the basics of what you need to know before you go, we will share a list of things that might be nice to know:
- Remember to buy travel insurance. Going on a trek in the Himalayas involves risks such as falling or getting altitude sickness. It is absolutely necessary to have travel insurance in case you need a rescue.
- Bring mosquito repellent. You might encountermosquitos and leeches on the trek, particularly if you hike during or at the end/beginning of monsoon season. Be aware that Dengue fever is quite common in Nepal – we met several trekkers who were unfortunate enough to get sick on their hikes.
- Avoid meat. Meat has to be carried all the way to the teahouses on either human, yak, or horse back, meaning that it is difficult to guarantee that it is still fresh when used for cooking. In order to avoid getting sick, we recommend that you avoid meat all together.
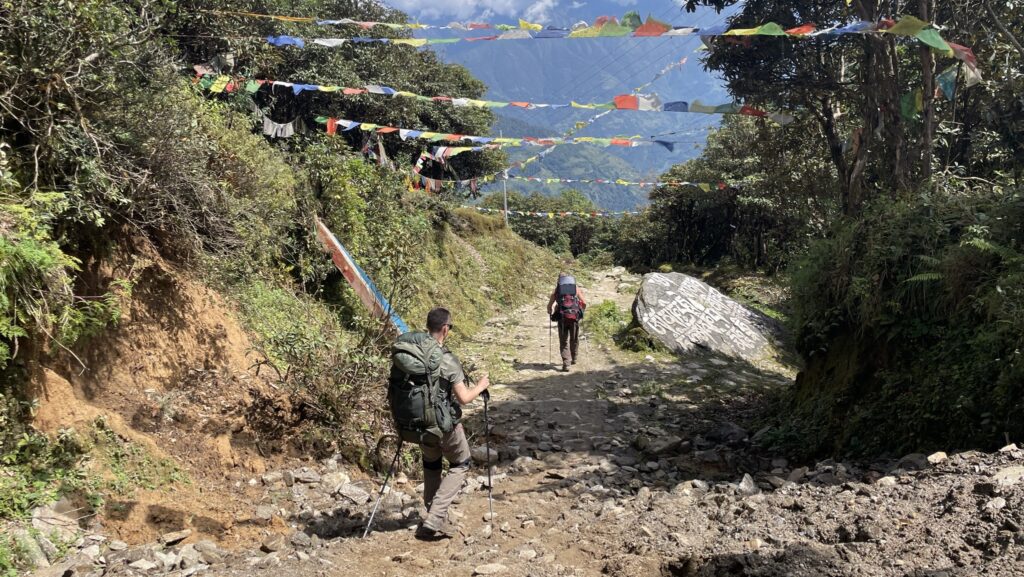
- Walk clockwise around prayer walls. You will pass by multiple Buddhist prayer walls, flags, and wheels on the way to Lukla. Remember to walk left of the prayer walls and spin the prayer wheels clockwise using your right hand as this is believed to give you luck on your journey.
- Consider walking all the way to Namche. Namche can be reached in two days from Lukla and is an beautiful, iconic village in the Everest Region. There is plenty of stuff to do here: You can visit a cute cafe to have a coffee and/or a piece of cake, go to a bar to watch a movie about Mount Everest, or visit one of the many museums.
Bringing Money for the Trek
While a few places might accept credit cards, most guesthouses only accept cash. This means that, generally, you will have to pay with cash almost everywhere on the trek (that is, of course, unless if you do the trek as a pre-paid tour through a trekking company).
There are no ATM’s along the way, meaning that you will have to carry cash for the entire trek when you leave Kathmandu. We heard that there is an ATM in Lukla as well, but we did not see it when we were there and cannot confirm it.
Bringing Cash from Kathmandu
Since many credit cards have a daily withdrawal limit, we strongly encourage you to bring cash with you from your home country and exchange it in Kathmandu. There are several money changers in Thamel, and using Google Maps, you should be able to find one with good reviews and fair rates.
Unfortunately, you are not allowed to bring nepalese rupees to Nepal. Hence, exchanging money before you arrive at Kathmandu is not an option.
Budget
Since you will have to carry money for the entire trek, you are probably wondering how much you should expect to spend. In all honesty, your daily budget highly depends on how much you are willing to spend. Prices are generally lower on this trek compared to high altitude treks, making the trip quite affordable. Your daily budget can range from 1500-4000 npr ($ 11-30) per person per day, depending on how much tea, coffee, beer, food, and snacks you buy.
How Much Did We Spend?
On average, we spend around 2200 npr ($ 16.5) per person per day on accommodation, food, snacks and tea. We often had dal bhat for dinner, tea in the afternoon, and one meal each for breakfast and lunch. We brought snacks from Kathmandu and did not spend money on bottled water or beer.
Our Complete Budget Breakdown
Here is a detailed run down on what we (2 people) spent on our 7-day trek from Jiri to Chaurikharka (close to Lukla):
- Permits: 6000 npr
- Snacks and toiletries bought in Kathmandu: 5700 npr
- Food & accommodation at teahouses: 25,530 npr
- Bus from Kathmandu to Jiri: 2000 npr
- Taxi to the bus stop in Kathmandu: 1000 npr
Ressources
- Apps for navigation: Maps.me, Guru Maps, and Gaia GPS (links for iOS).
- Lonely Planet Guidebook Trekking in the Nepal Himalaya (2015 edition).
- Cicerone Guidebook to the Everest Region. A Trekker’s Guide (2023 edition).
- Everest Base Camp Facebook Group for up-to-date information, recommendations, and questions about your trek.
- Information about visa and permits: Nepal Tourism Board.
Day-to-day Descriptions
Day 1: Jiri to Shivalaya (3.5 hours)
After a 7-hour bus ride, the trek begins on the jeep track leading out of the village of Jiri. You will soon see a sign to Shivalaya leading you off to the left passing by several pretty houses and fields. We found route finding a bit confusing here and were happy to have Maps.me with us to help find the right track.
After having climbed for about an hour, the trail reaches a pass and from here, the route continues downhill through forest to Shivalaya. The path was muddy and slippery with plenty of leeches when we were there in September. Before reaching the town, you will have to cross your first suspension bridge leading straight to the village and a fine selection of guesthouses.
Accommodation in Shivalaya: Riverside Guesthouse
Day 2: Shivalaya to Kinja (8 hours)
The trail starts by passing through the pretty village of Shivalaya. Before leaving the town, you will have to buy your permit for the Gaurishankar Conservation Area at the tourist office placed in the center of the village. From here, a steep 3-hour ascent begins towards Deurali situated at a pass with a couple of teahouses to have lunch at.
The trail continues down the side of the pass where it is possible to follow the steep, narrow trail or walk on the jeep track. Like yesterday, the trail is a bit slippery and requires some attention when walking down the many steps. Passing through Bhandar, you will pass by a couple of guesthouses, plenty of rice fields, and a beautiful monastery. After Bhandar, you will reach a jeep track that you have to follow for 7 km to Kinja. The path is easy going with lots of waterfalls on the way, and the track eventually joins the river before reaching Kinja.
Accommodation in Kinja: Riverside Guesthouse
Day 3: Kinja to Goyam (5.5 hours)
Today’s ascent is a big one – almost 1600 m of steady climbing towards Goyam. The first part of the climb from Kinja is a rather steep trail past a mix of forest and houses with vegetable fields. After 2-3 hours of trekking, you will reach the village of Sete where it is possible to have lunch. Further up the trek, the distances between houses increase and we get the feeling that this part is considerably more remote than what we have encountered the last few days. After a couple hours more of climbing, we reach Goyam where we stop for the night.
Accommodation in Goyam: Tashi Delek Guesthouse

Day 4: Goyam to Phurteng (6 hours)
The trail starts with the final climb towards Lamjura La Pass (3500 m), marking the highest point on this trek. The path is gentle and partly follows a jeep track, passing two guesthouses just before reaching the pass. On the other side, the descent down towards Junbesi is very steep through coniferous forest. At last, the trail flattens and becomes easier as it nears Junbesi, passing a couple more guesthouses as well as a monastery on the way. We reached Junbesi by lunch time and took a break here. Continuing out of the village, the trail climbs yet again through more forest until it reaches Phurteng. Here are two guesthouses to stay at, and if the weather is clear, you will be able to see Mount Everest for the first time!
Accommodation in Phurteng: Everest View Lodge
Day 5: Phurteng to Nunthala (6 hours)
The start of today’s trek is beautiful following the side of a mountain with stunning views of Mount Everest and the surrounding mountains. After a couple of kilometers, you will reach another small village, Salung, and the trail begins descending afterwards passing through forests and many incredible waterfalls. At the bottom of the valley, the trail turns East and crosses a large river before climbing steeply towards Ringmu, a pretty village with several lodges. After yet another couple hundreds meters of ascent, the trail reaches Taksindu La Pass from where you can see all the way back to Phurteng. From here, it is only a short descent to Taksindu. If you continue on for about 1½ hour, you will reach Nunthala with multiple options for accommodation.
Accommodation in Nunthala: Sangrila Guesthouse
Day 6: Nunthala to Khare (6 hours)
From Nunthala, the first part of the trek is a long descent on plenty of steps to Jubing. The trail passes through forest and by houses before reaching another large suspension bridge just before Jubing. After Jubing, the path rises gently towards the pass close to Kharikola. At the pass, you will find a colorful monastery that you can visit on the way. A short descent will lead you to Kharikola with multiple accommodation options. From Kharikola, the trail turns North and crosses another river before climbing towards Bupsa and Khare further on.
Accommodation in Khare: Chamling Lodge
Day 7: Khare to Chaurikharka (6 hours)
The beginning of today’s trek is very steep towards the small village of Puyia. In contrast to the last 6 days, the trek becomes considerably more busy and you will start encountering mules and yaks as they make they way towards Namche. The trail was extremely muddy when we were there (October), making for a slow going. Slowly, the landscape opens up and it is possible to see far into the valley towards Lukla. You will pass several small clusters of houses along the way, but we decided to have lunch at Khumbu View Lodge from where you can see Lukla and the planes flying in and out of the town. After Surke, the trail divides in two directions: One towards Chaurikharka (this is a short cut if you are continuing towards Namche), and one towards Lukla.
Accommodation in Chaurikharka: Everest Hotel
Did you find this post helpful? Let us know in the comments below!
More Exciting Treks in Nepal
Related posts
Gosainkunda Trek